If you have existing deployed Workflows on Extend predating April 2024, you likely have been (with the help of the Extend team) configuring and iterating on Extraction and Classification steps from directly within a given workflow. This means that each workflow had their own configuration for each processor, and you had to navigate to each workflow to make changes and export/import workflow configs to keep them in sync if you make changes to a processor used in more than one place. Similarly, you would have had to rely on the workflow runner to test processor changes, which was likely slow and cumbersome. With the introduction of Studio, we have introduced a new way to manage processors that is more efficient and scalable. This guide will help you migrate your existing processors to the new Studio experience.Documentation Index
Fetch the complete documentation index at: https://docs.extend.app/llms.txt
Use this file to discover all available pages before exploring further.
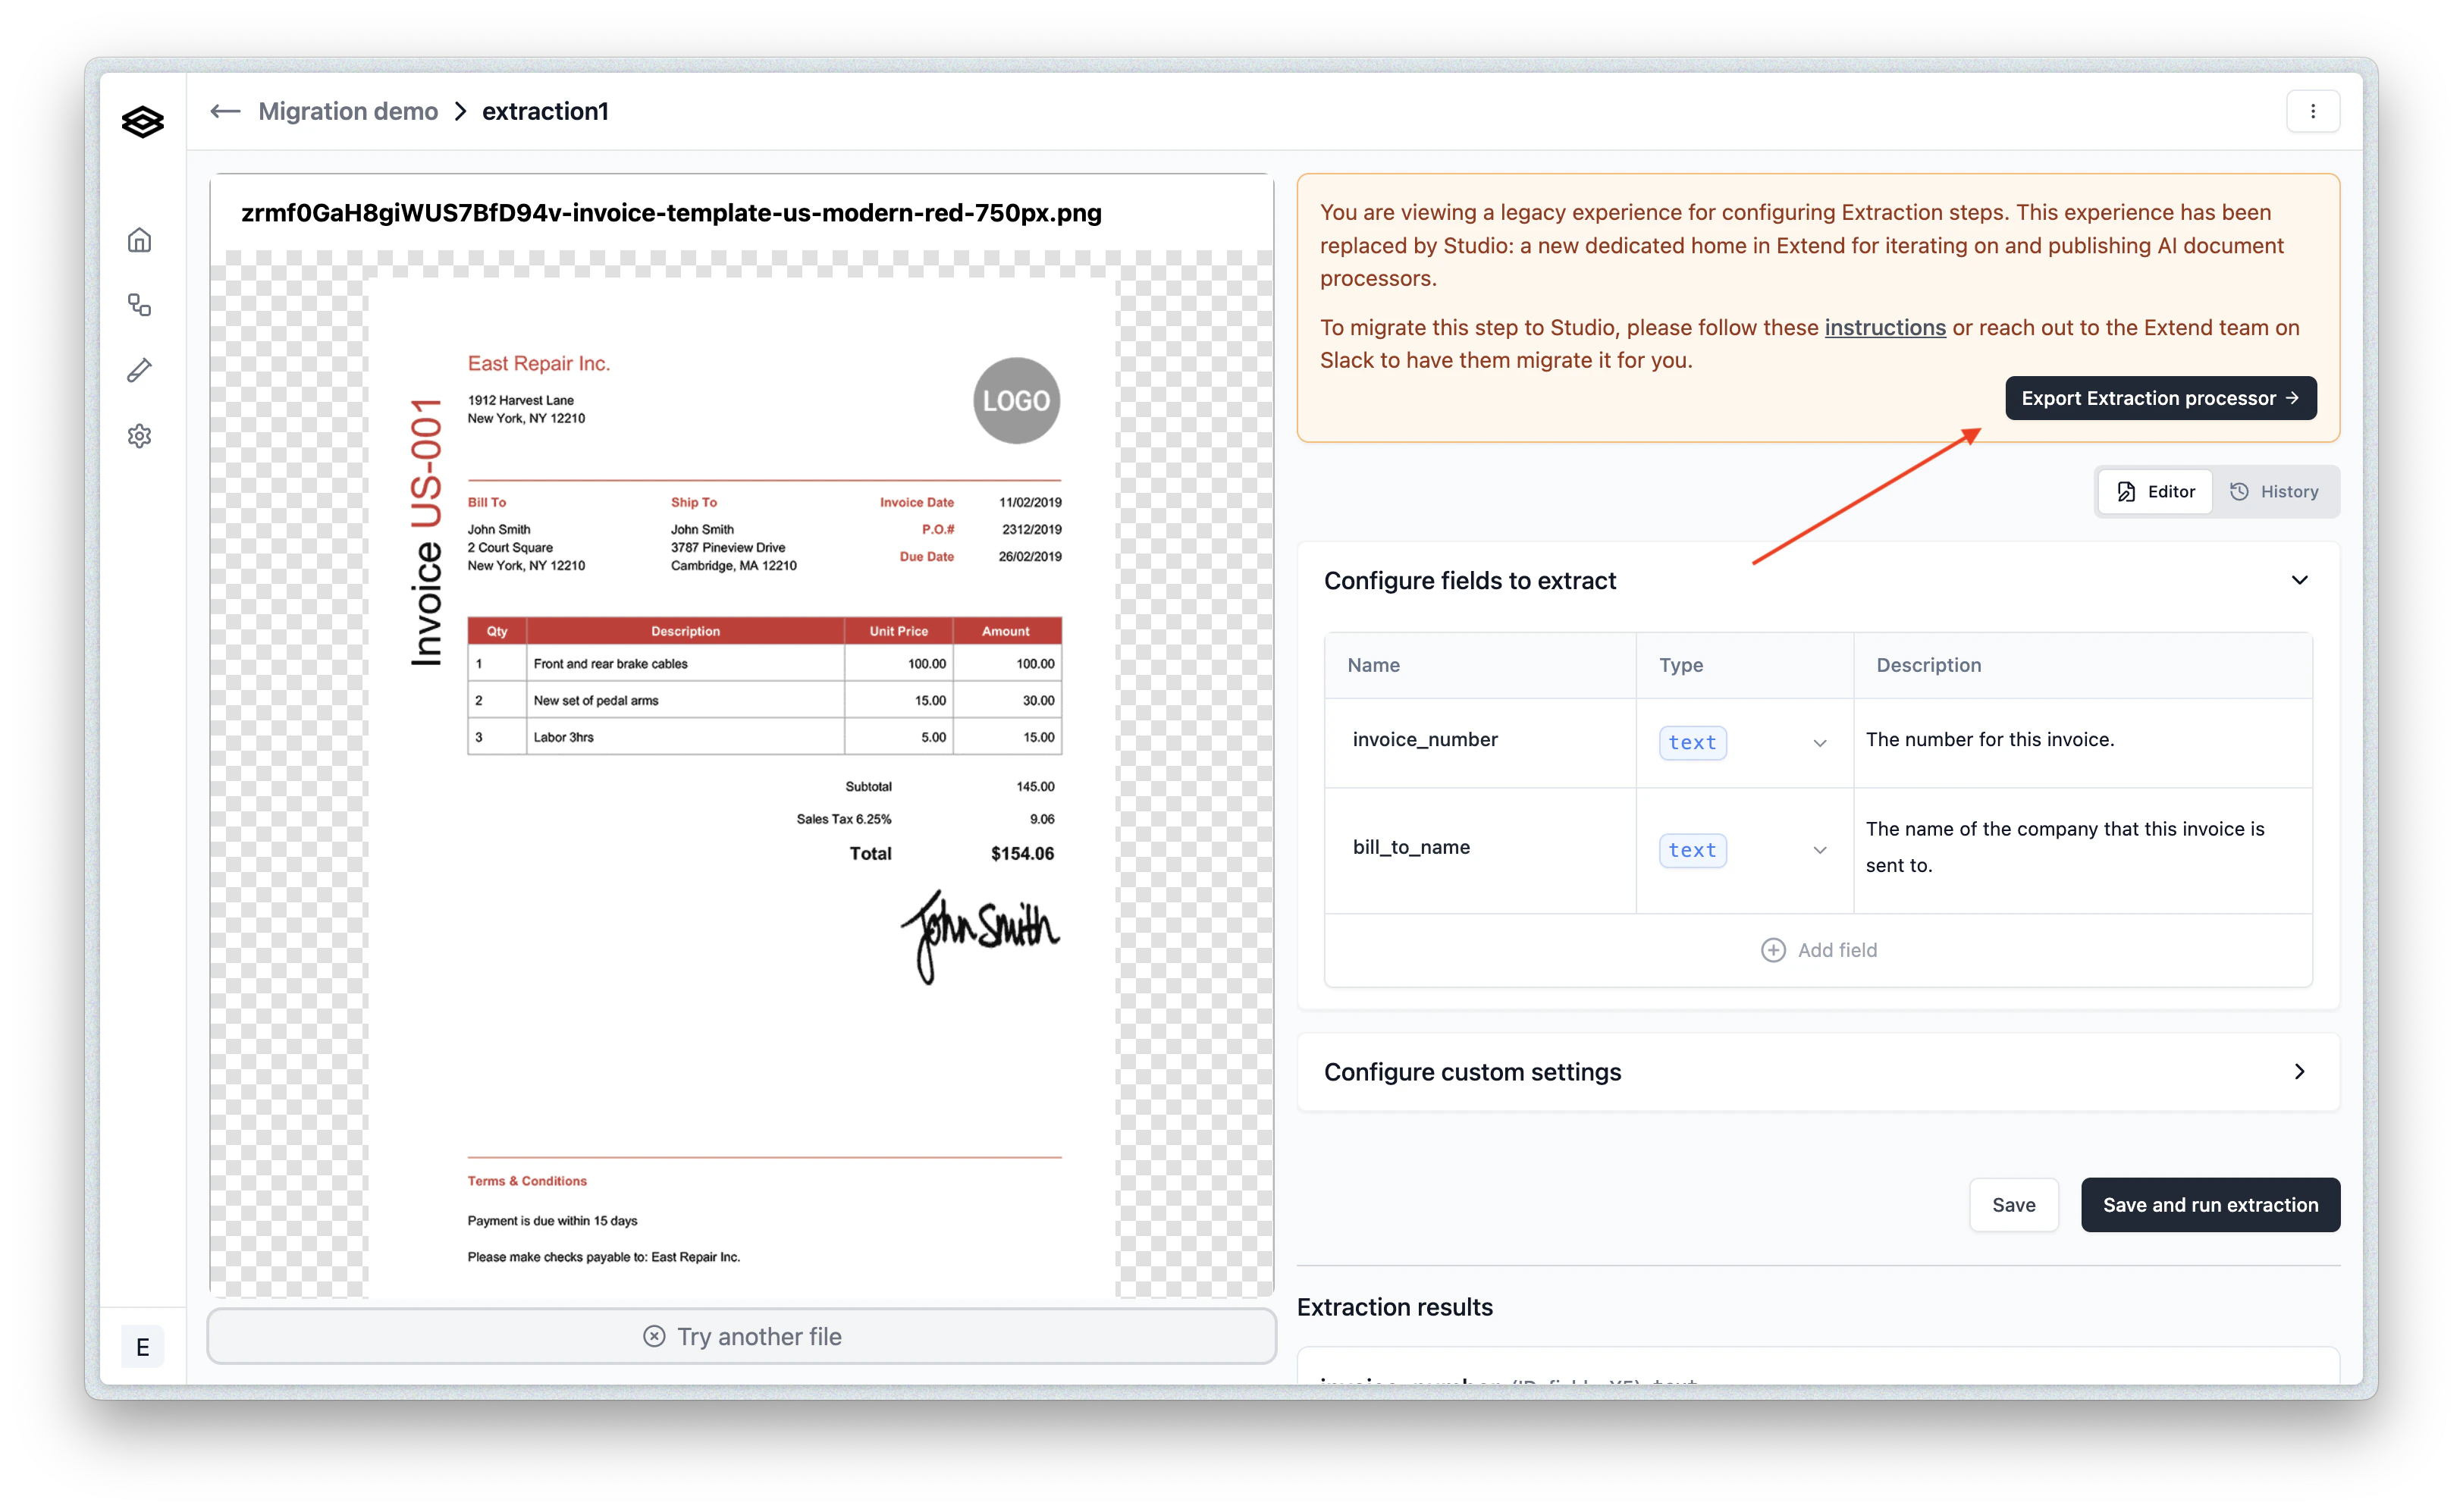
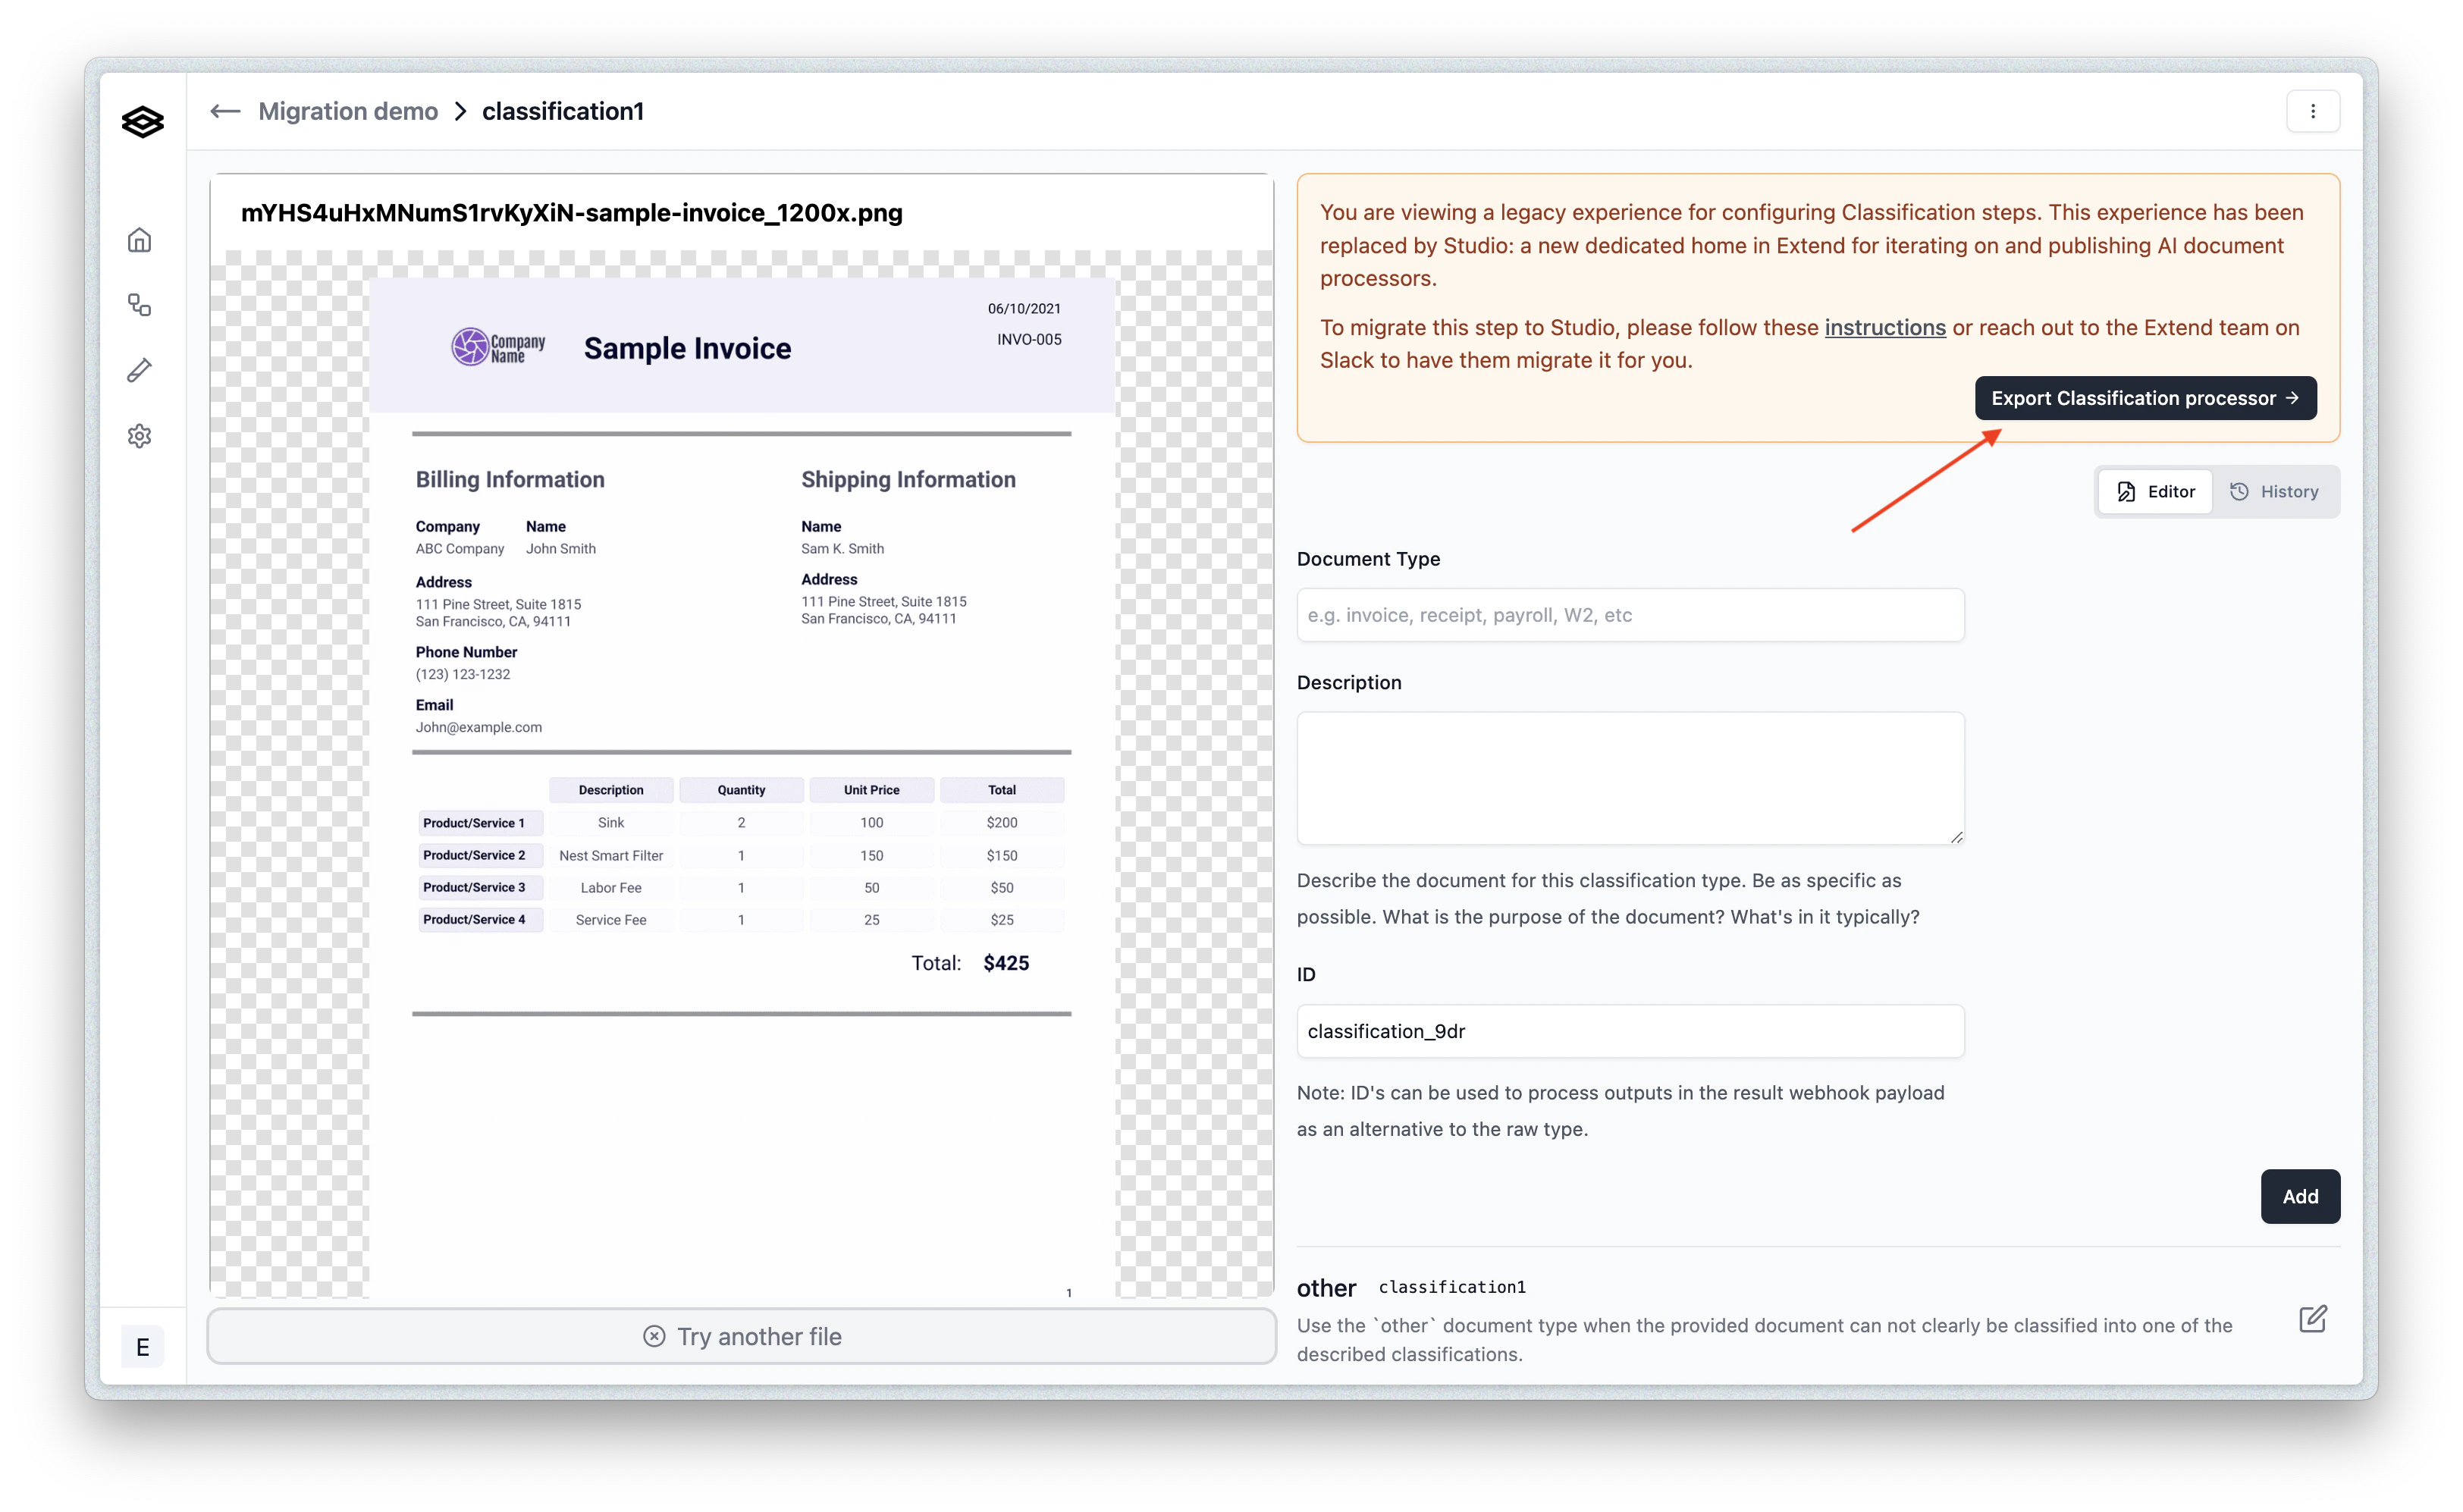
Step 1: Export the legacy processor
To start migrating a processor, first navigate to a workflow, and open the processor step you want to migrate. Remember, all of the following are “processor” steps: Extraction steps, Classification steps, and Instructive Q&A steps. Here is the workflow example we will migrating from: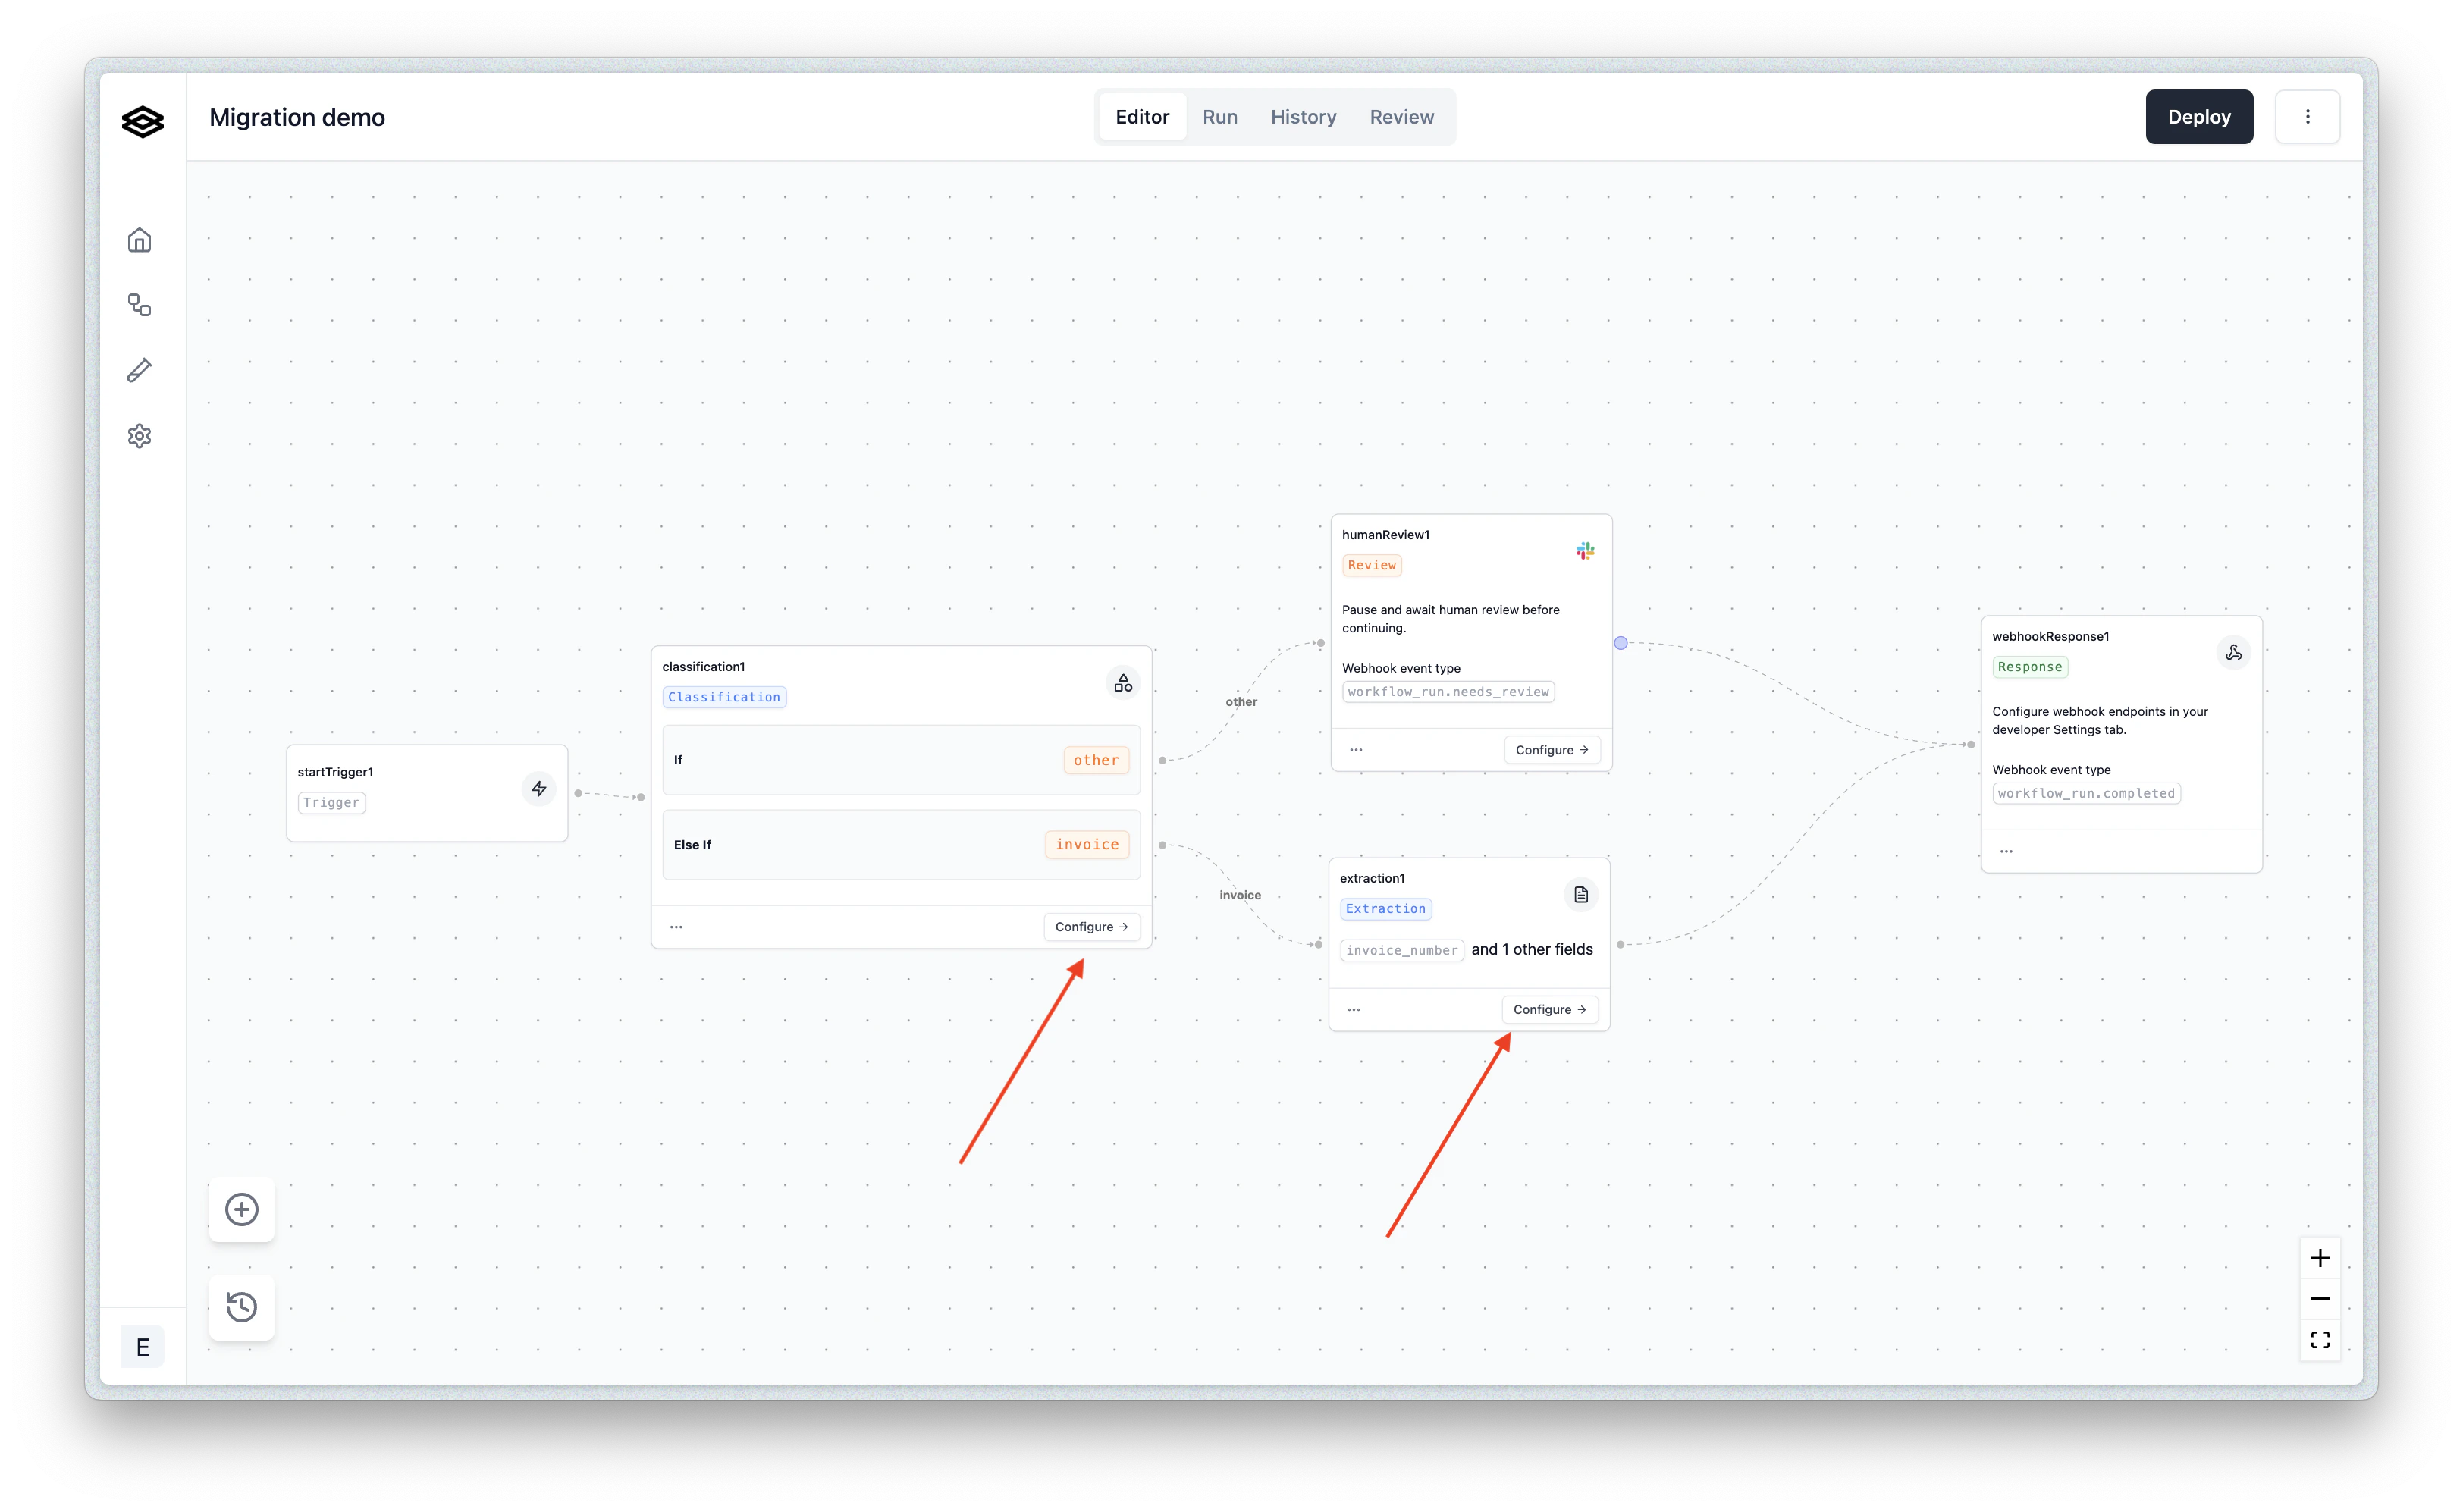
Step 2: Import the processor into Studio
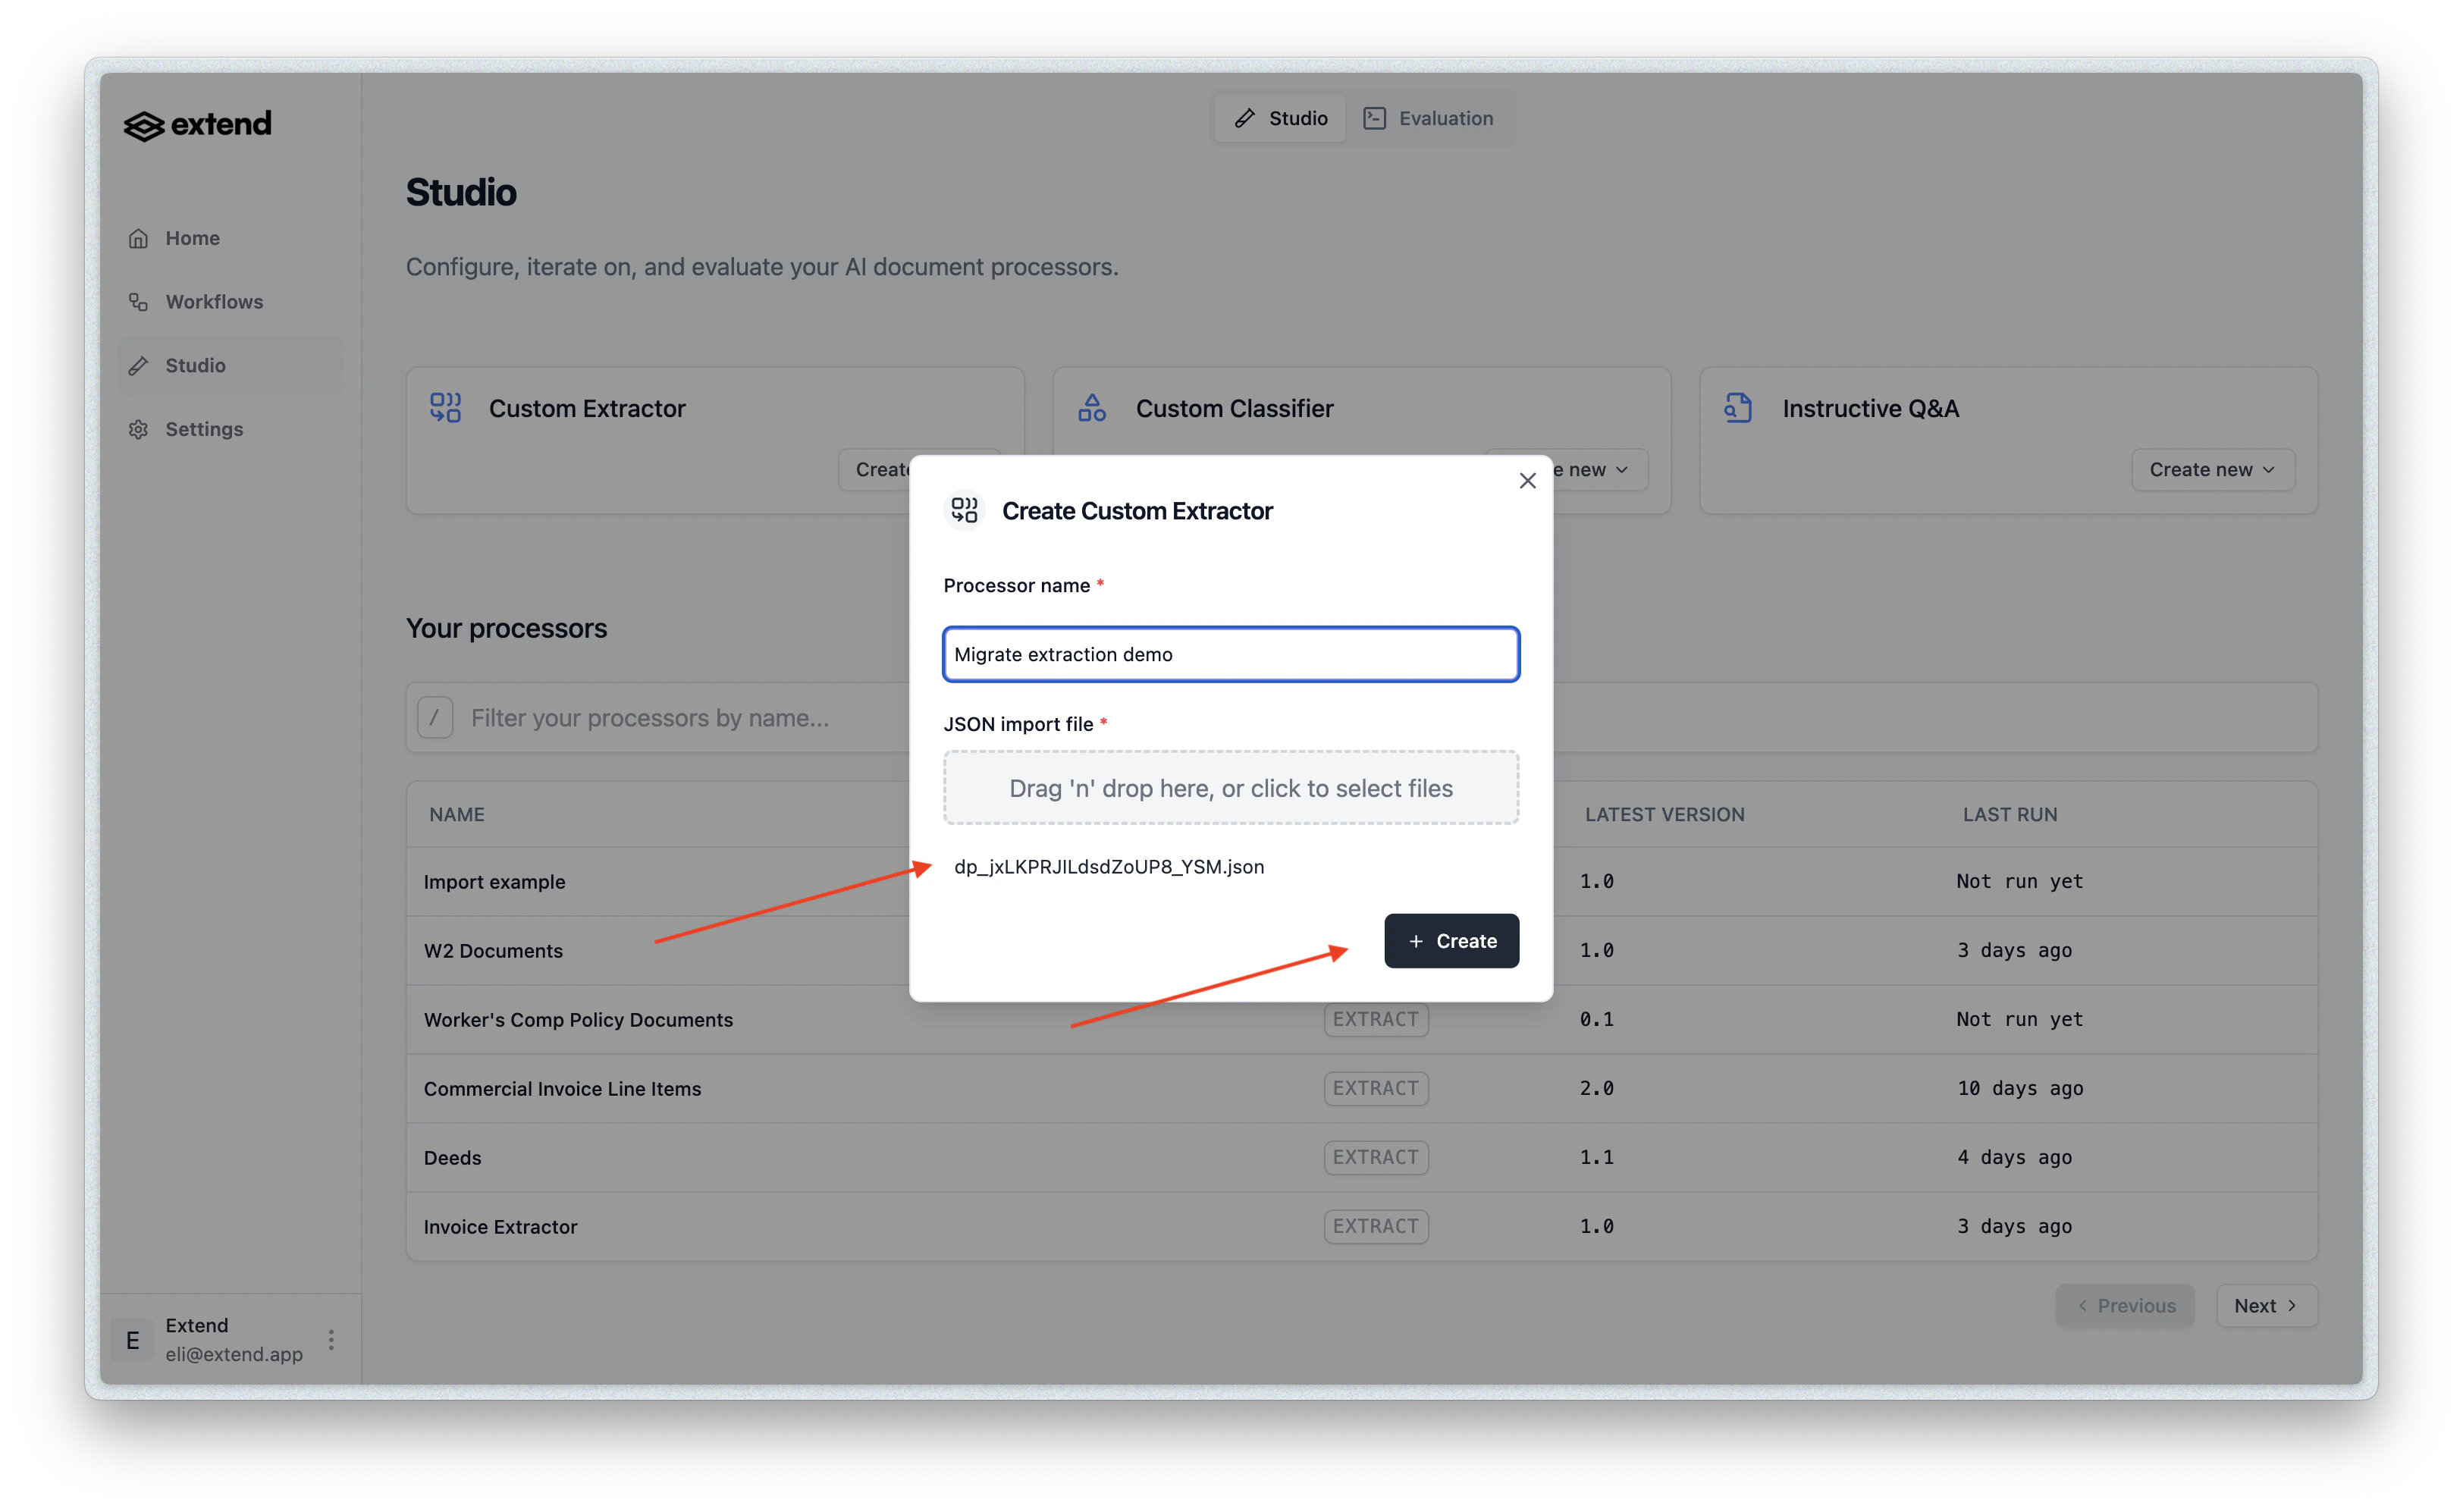
Navigate to the Studio tab in the Extend dashboard. Once open, you will see the options to create new processor. Click the “Create new” dropdown on the Custom Extractor module, and select “from JSON”: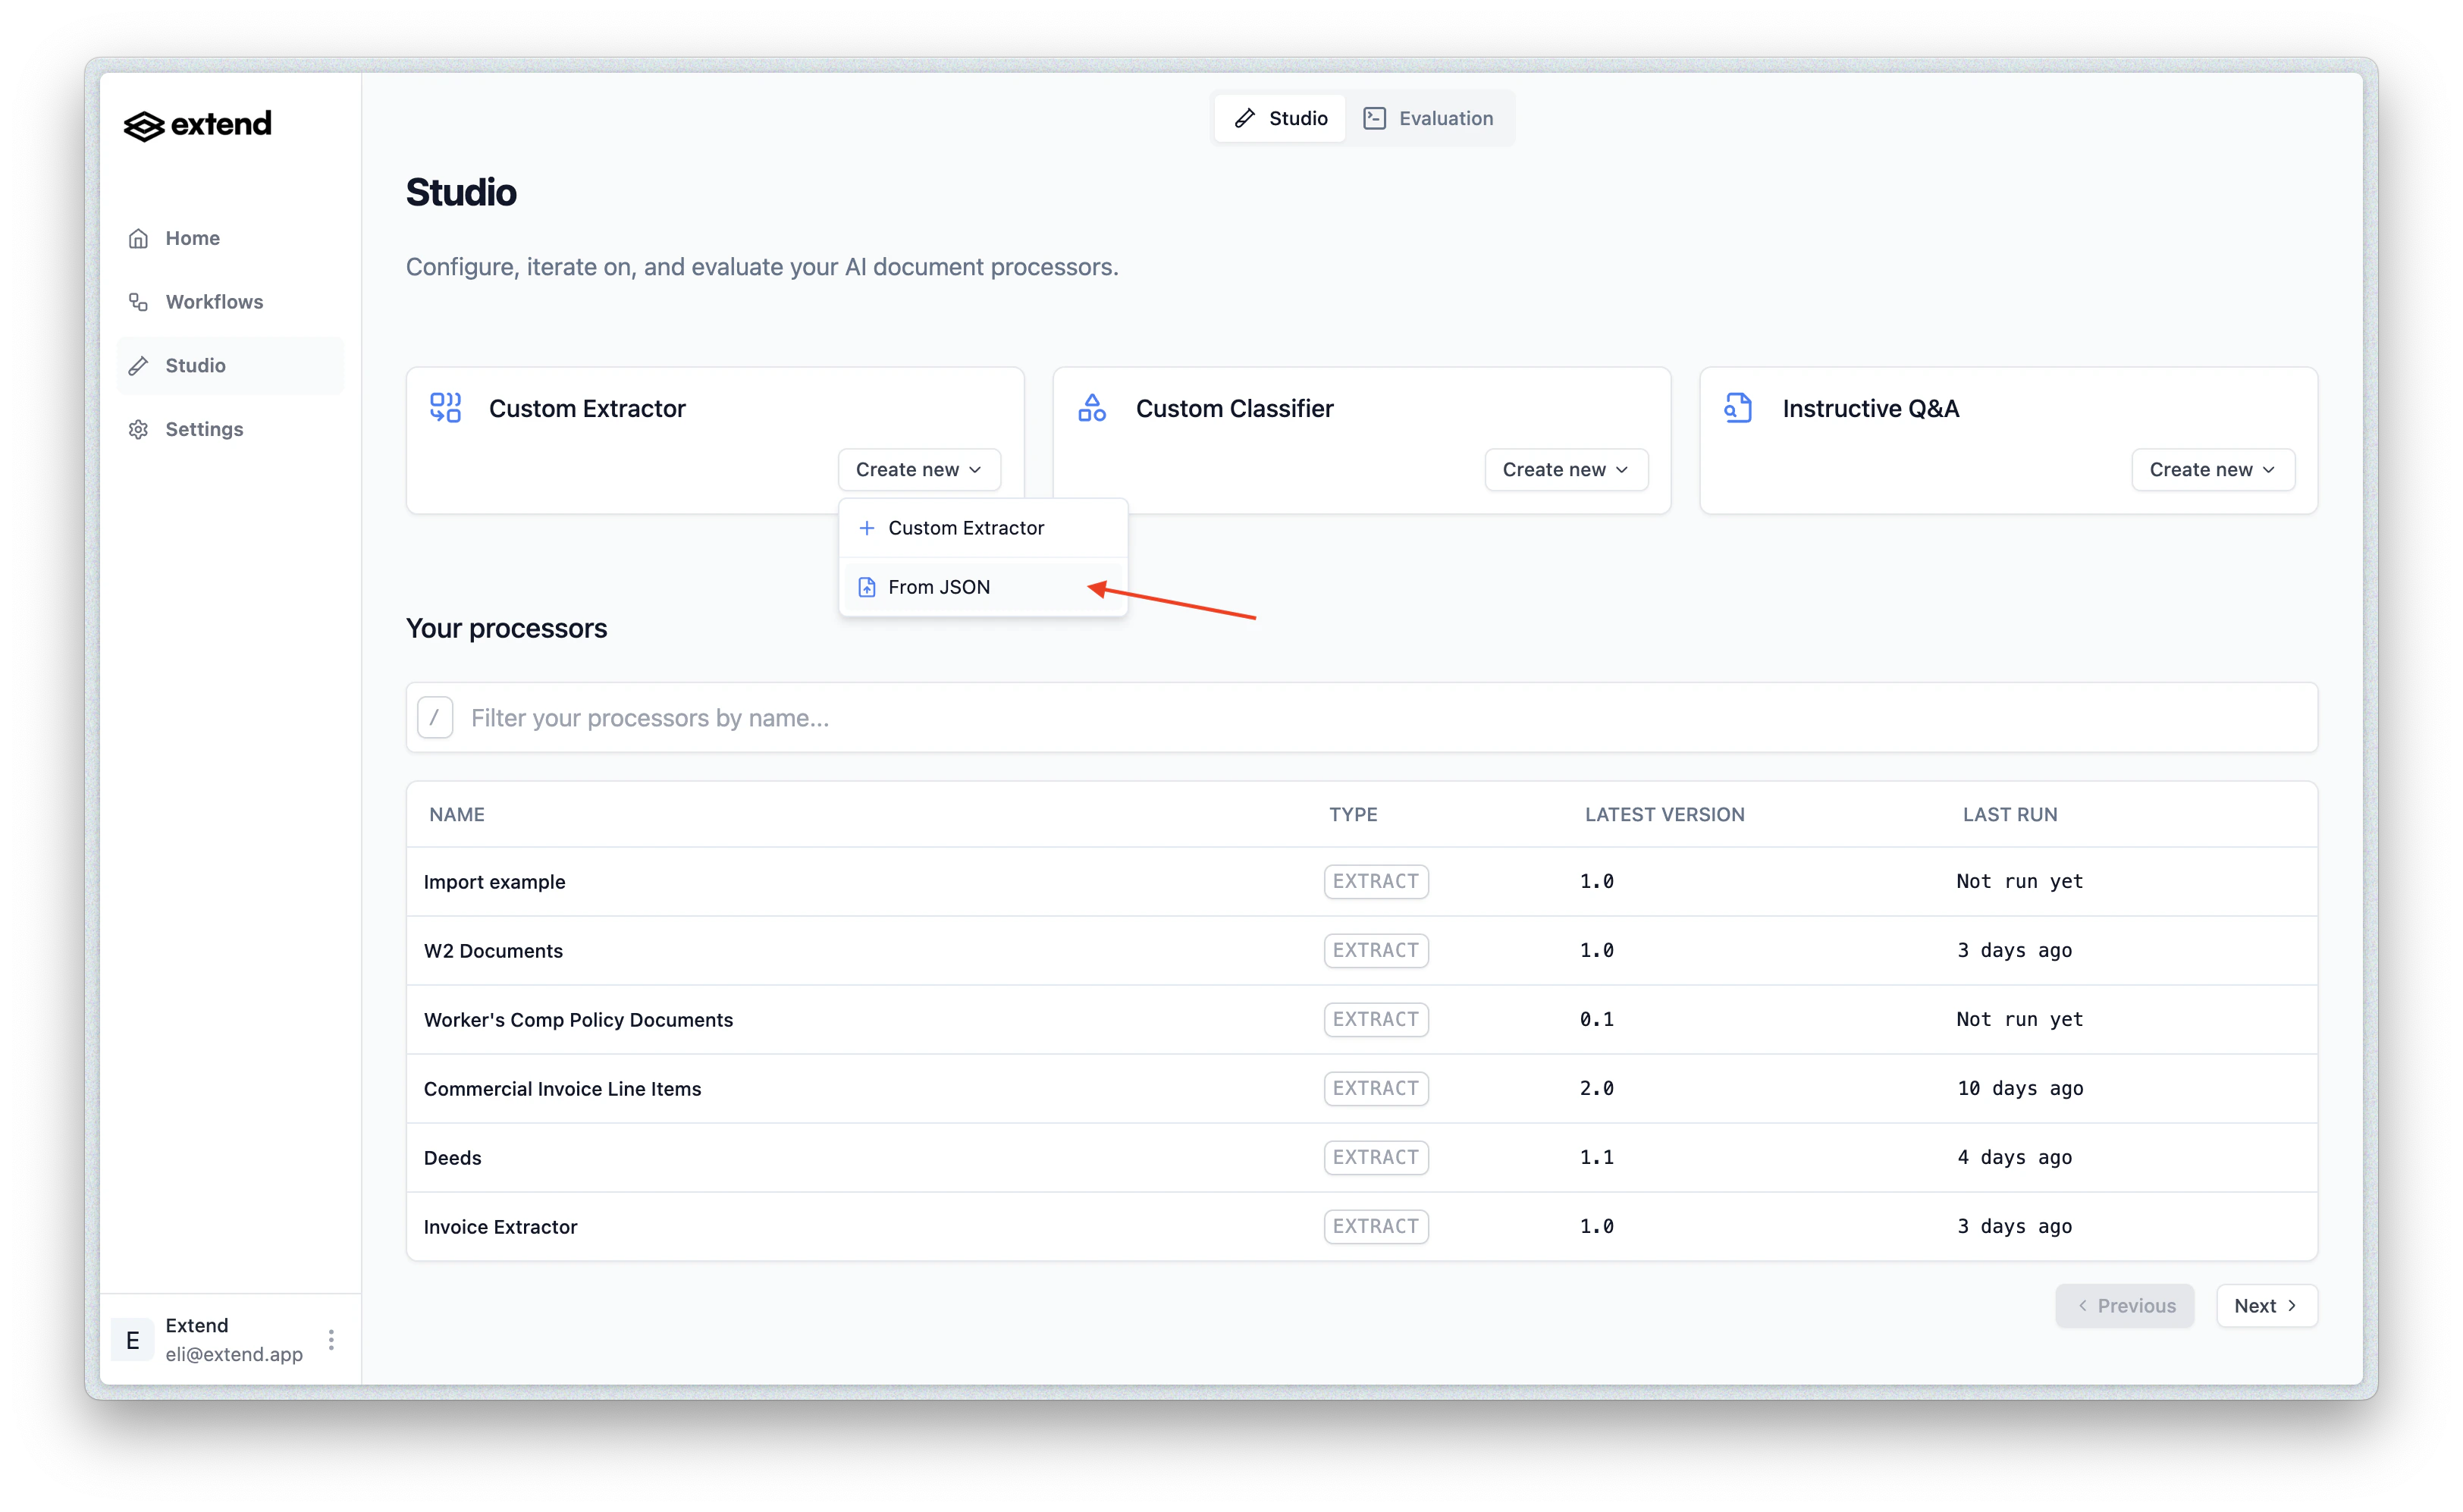
Step 3: Check you work
You should be redirected to a new processor detail page. Please ensure the config looks correct and that you have the correct name for the processor. If everything looks good, go ahead and first click “Save” to save a copy of the draft (or test run against a file if you’d like). Once saved/run, go ahead and click “Publish” to create the first version of the processor: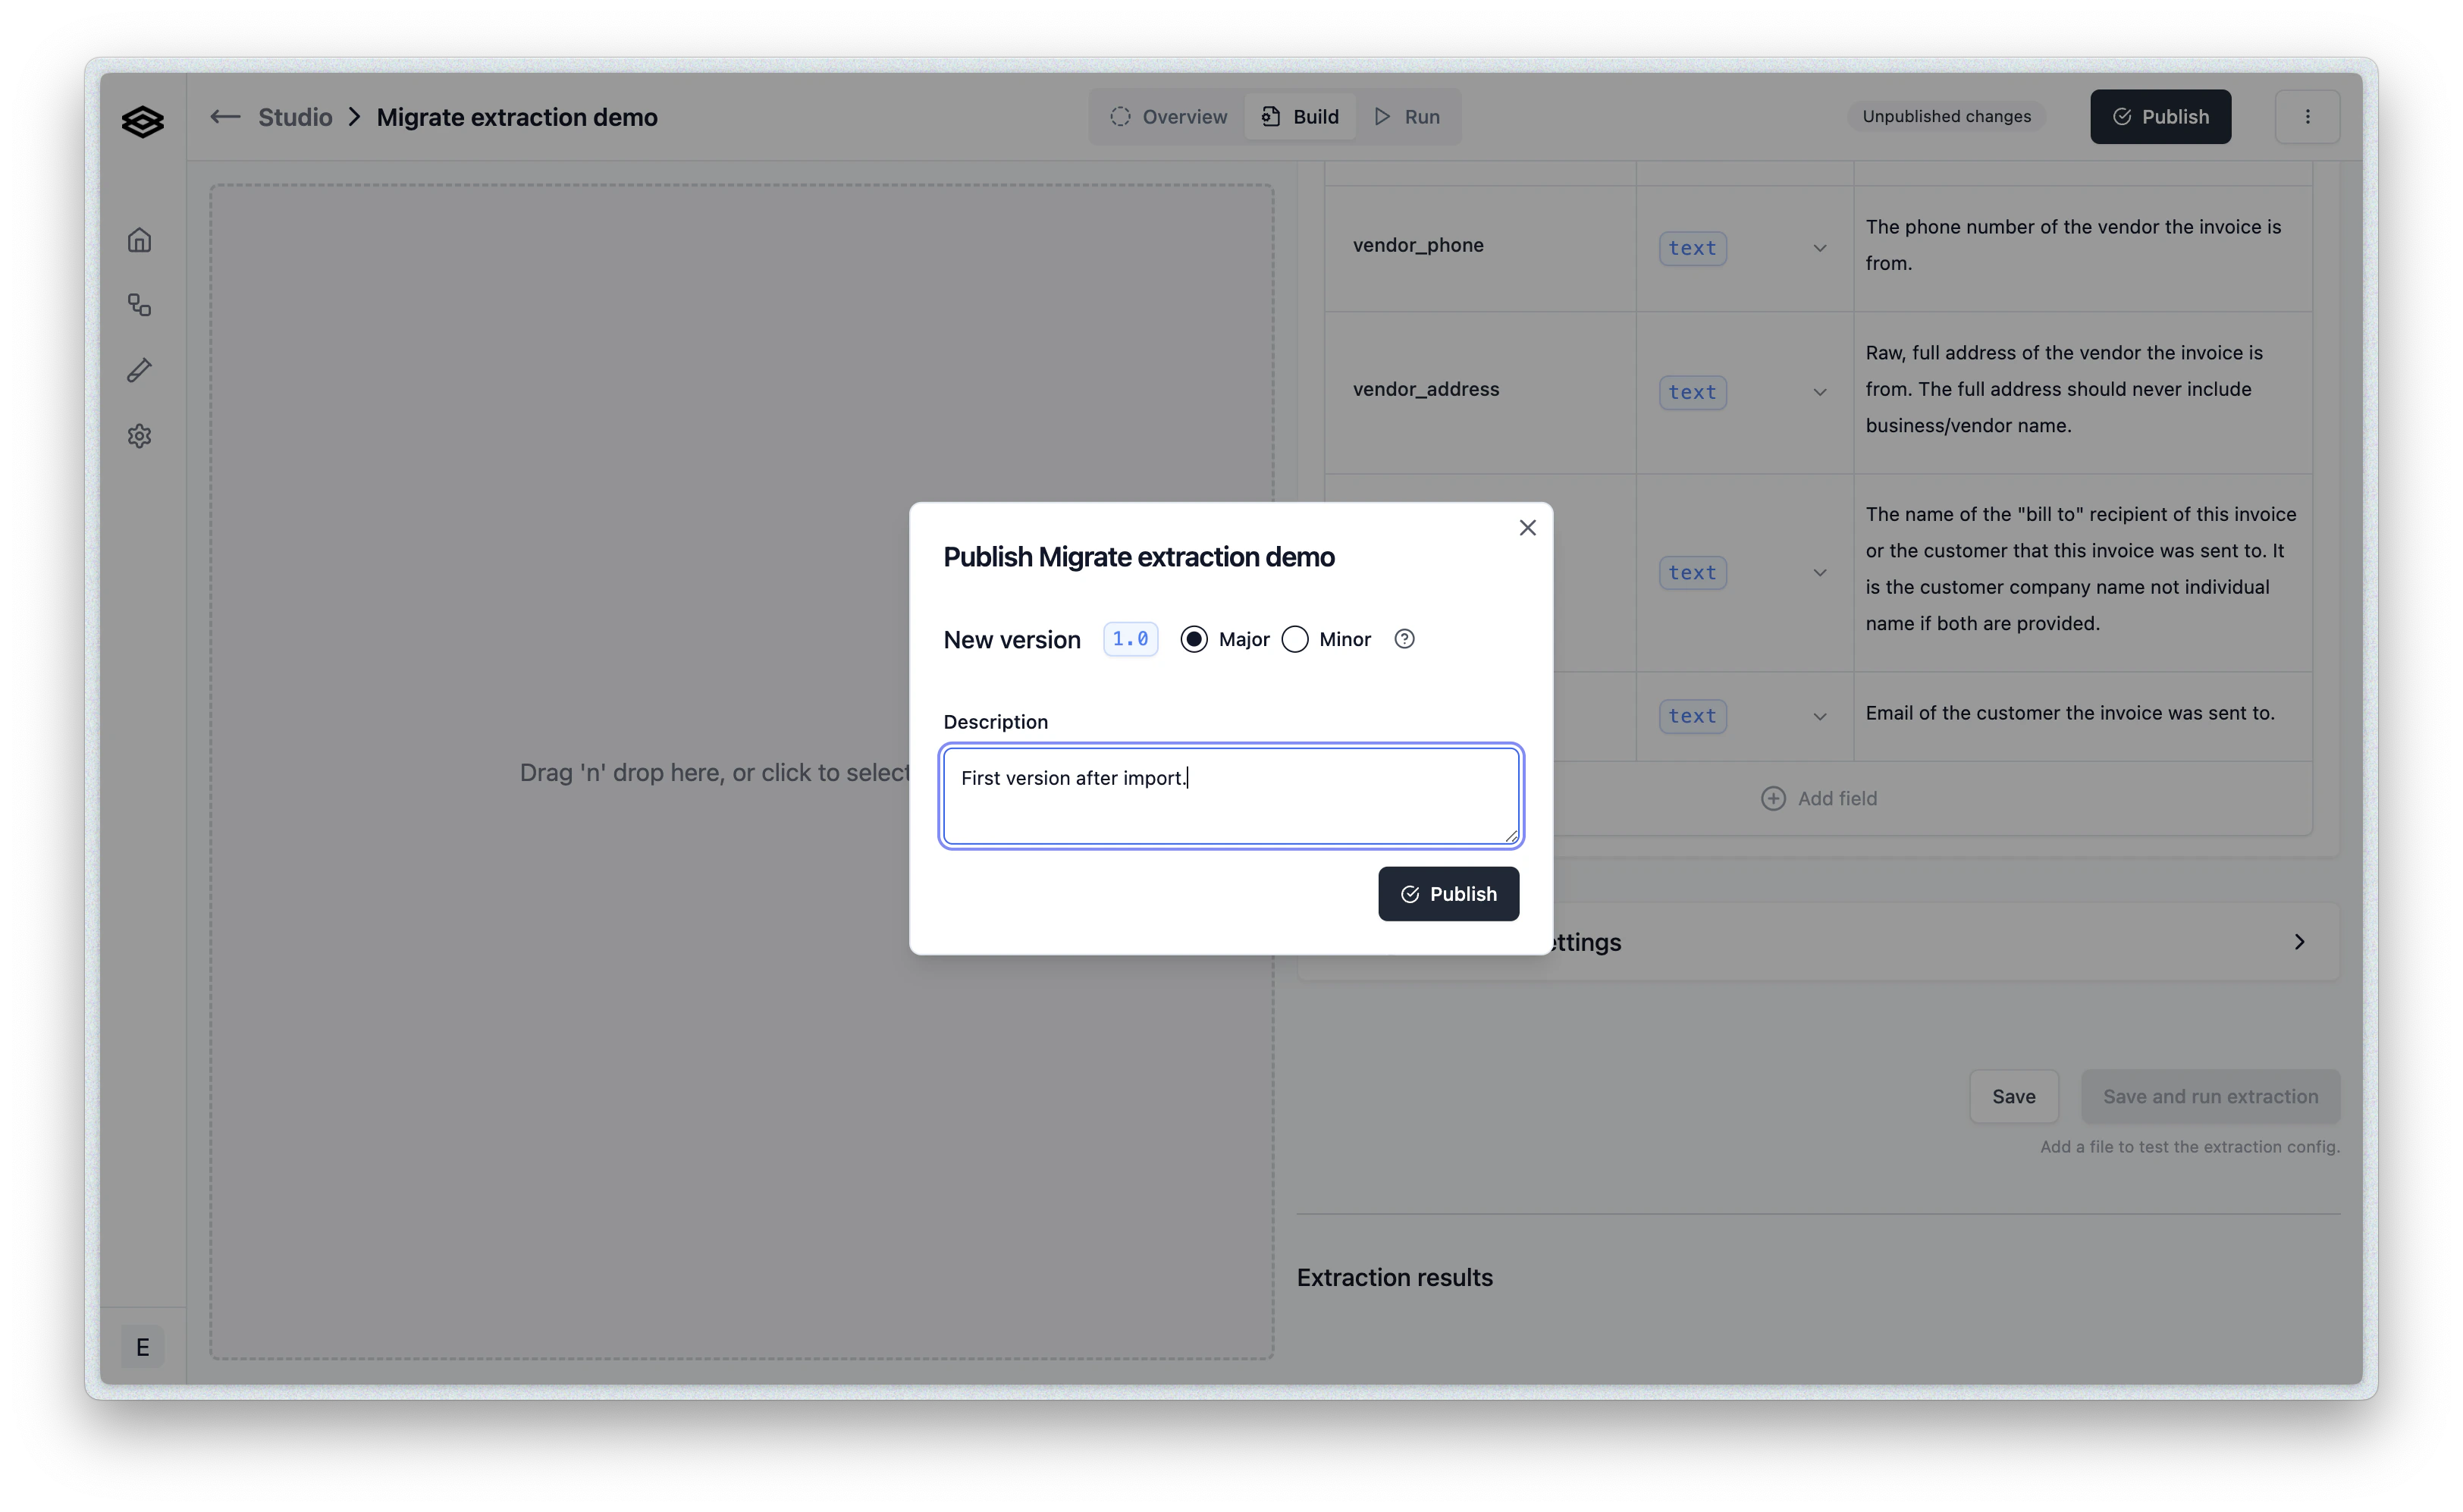
Step 4: Update the workflow to use the new processor
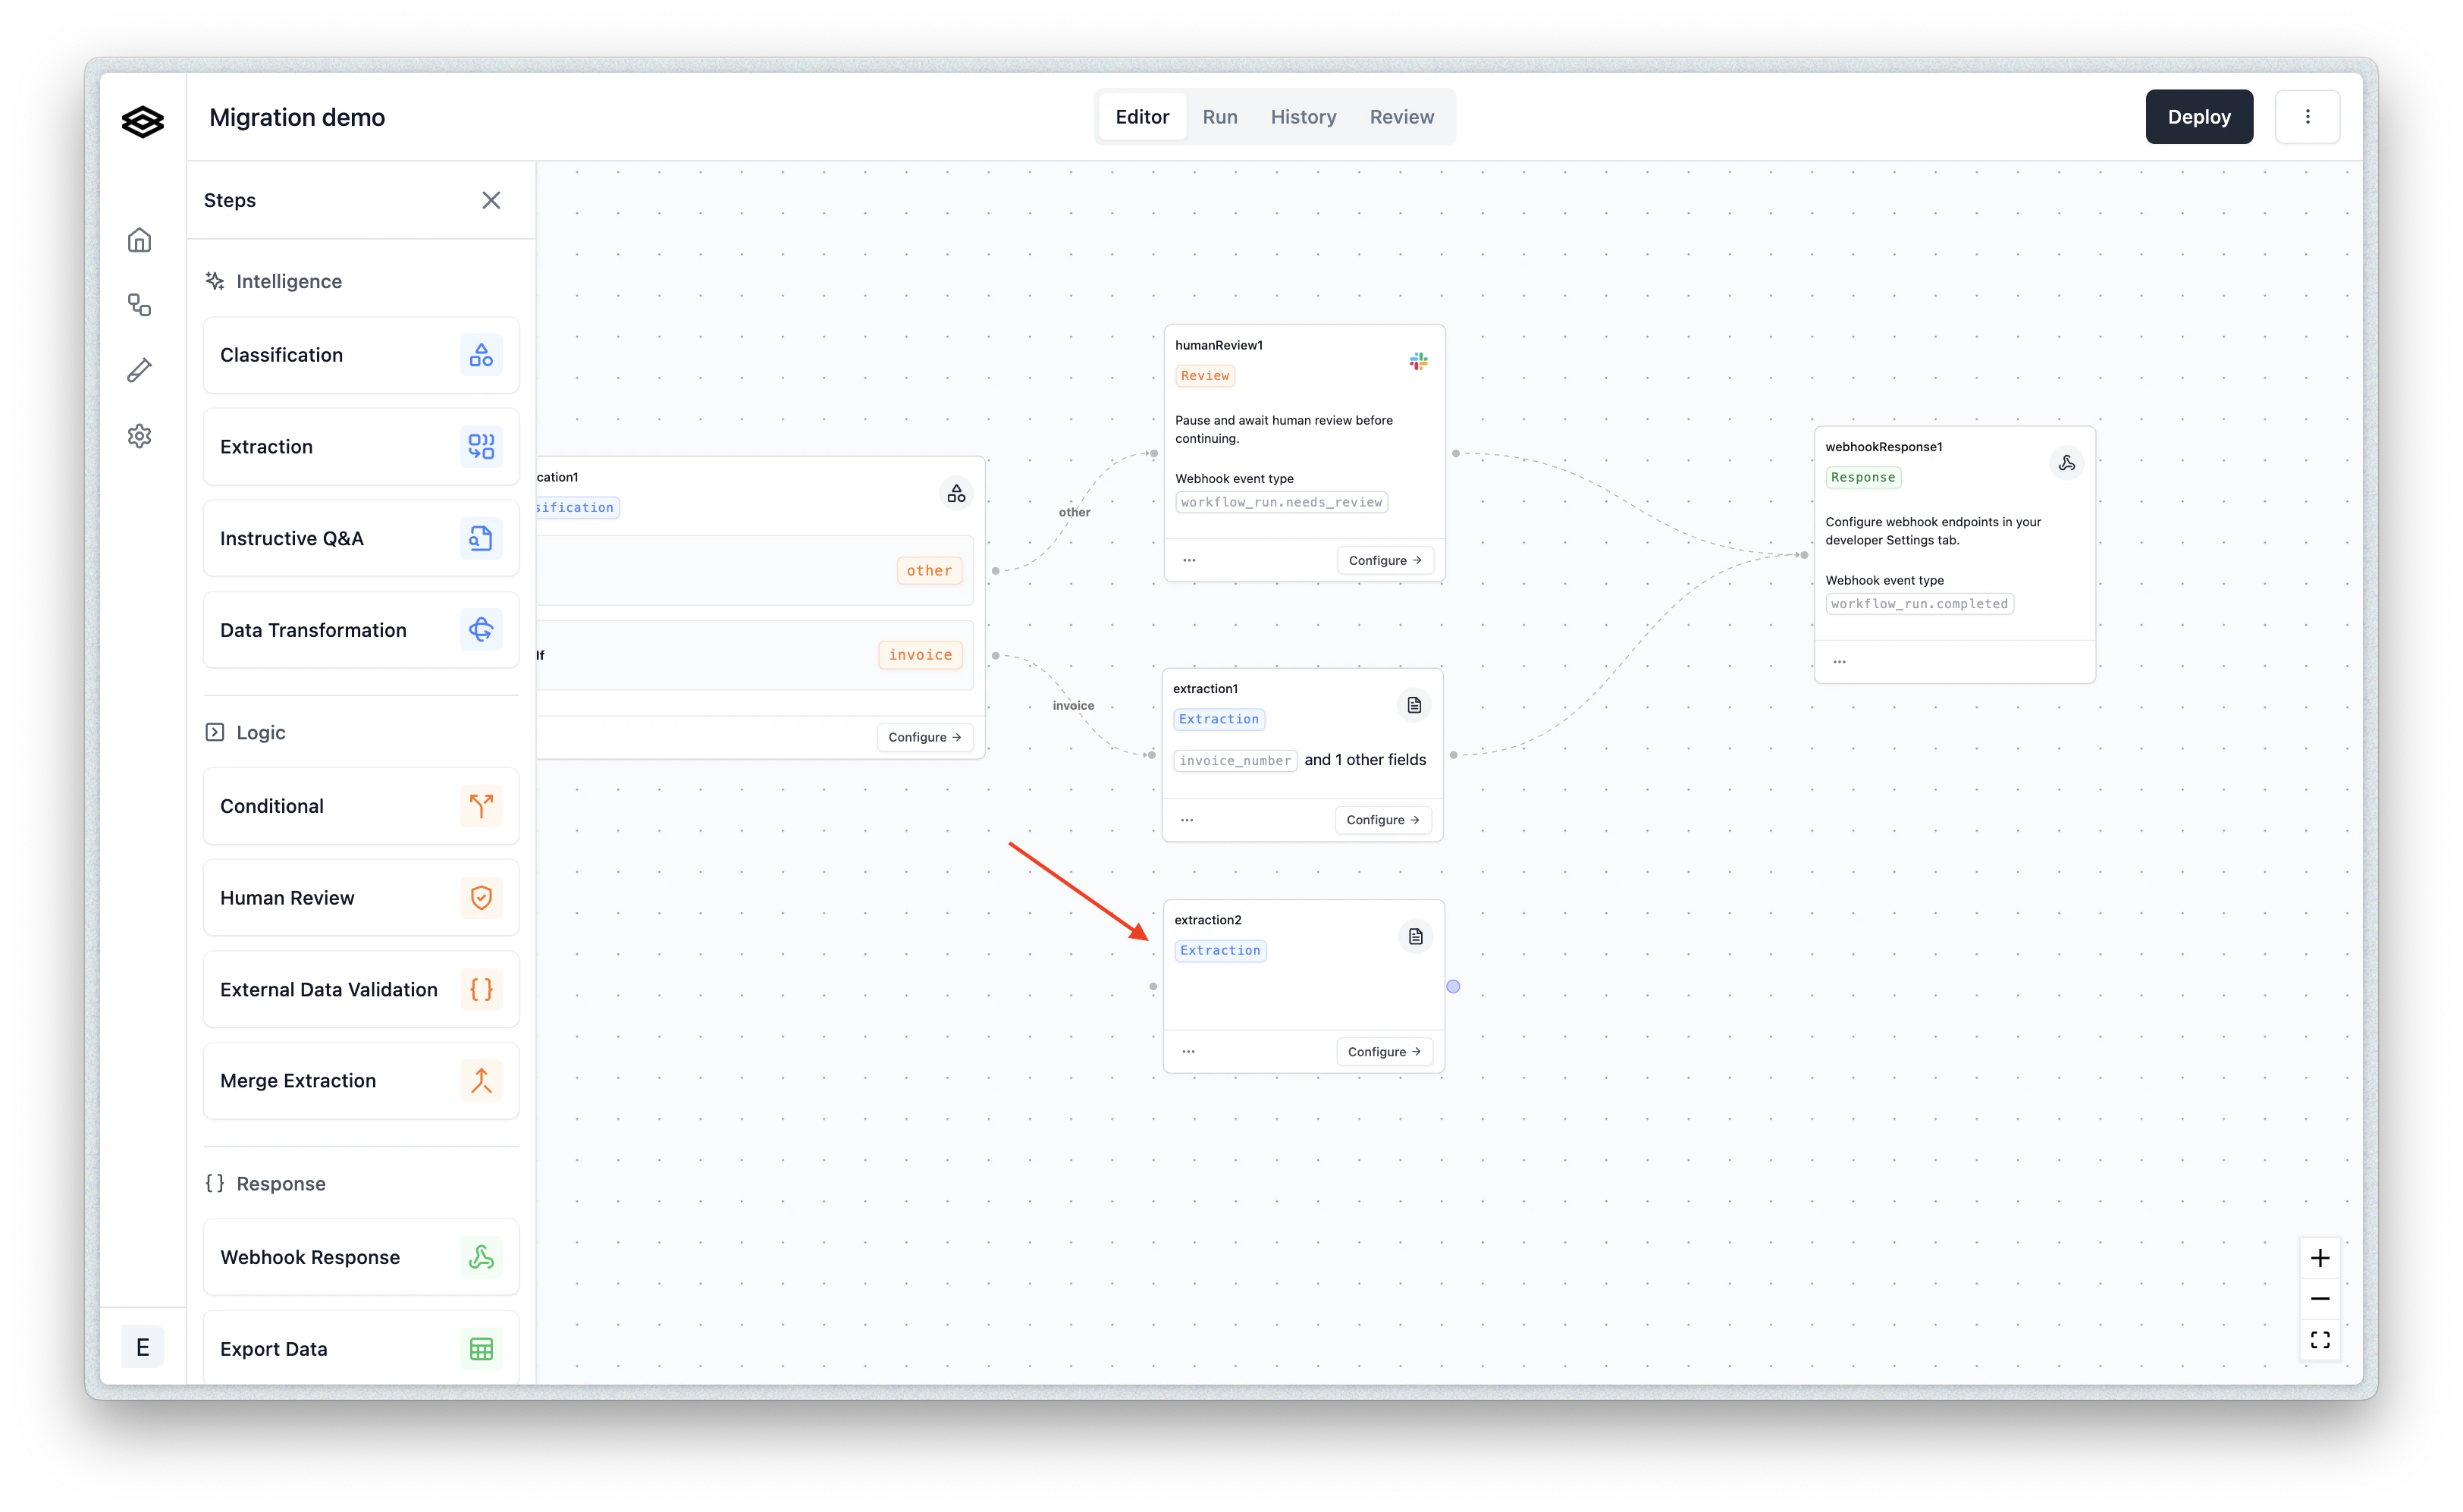
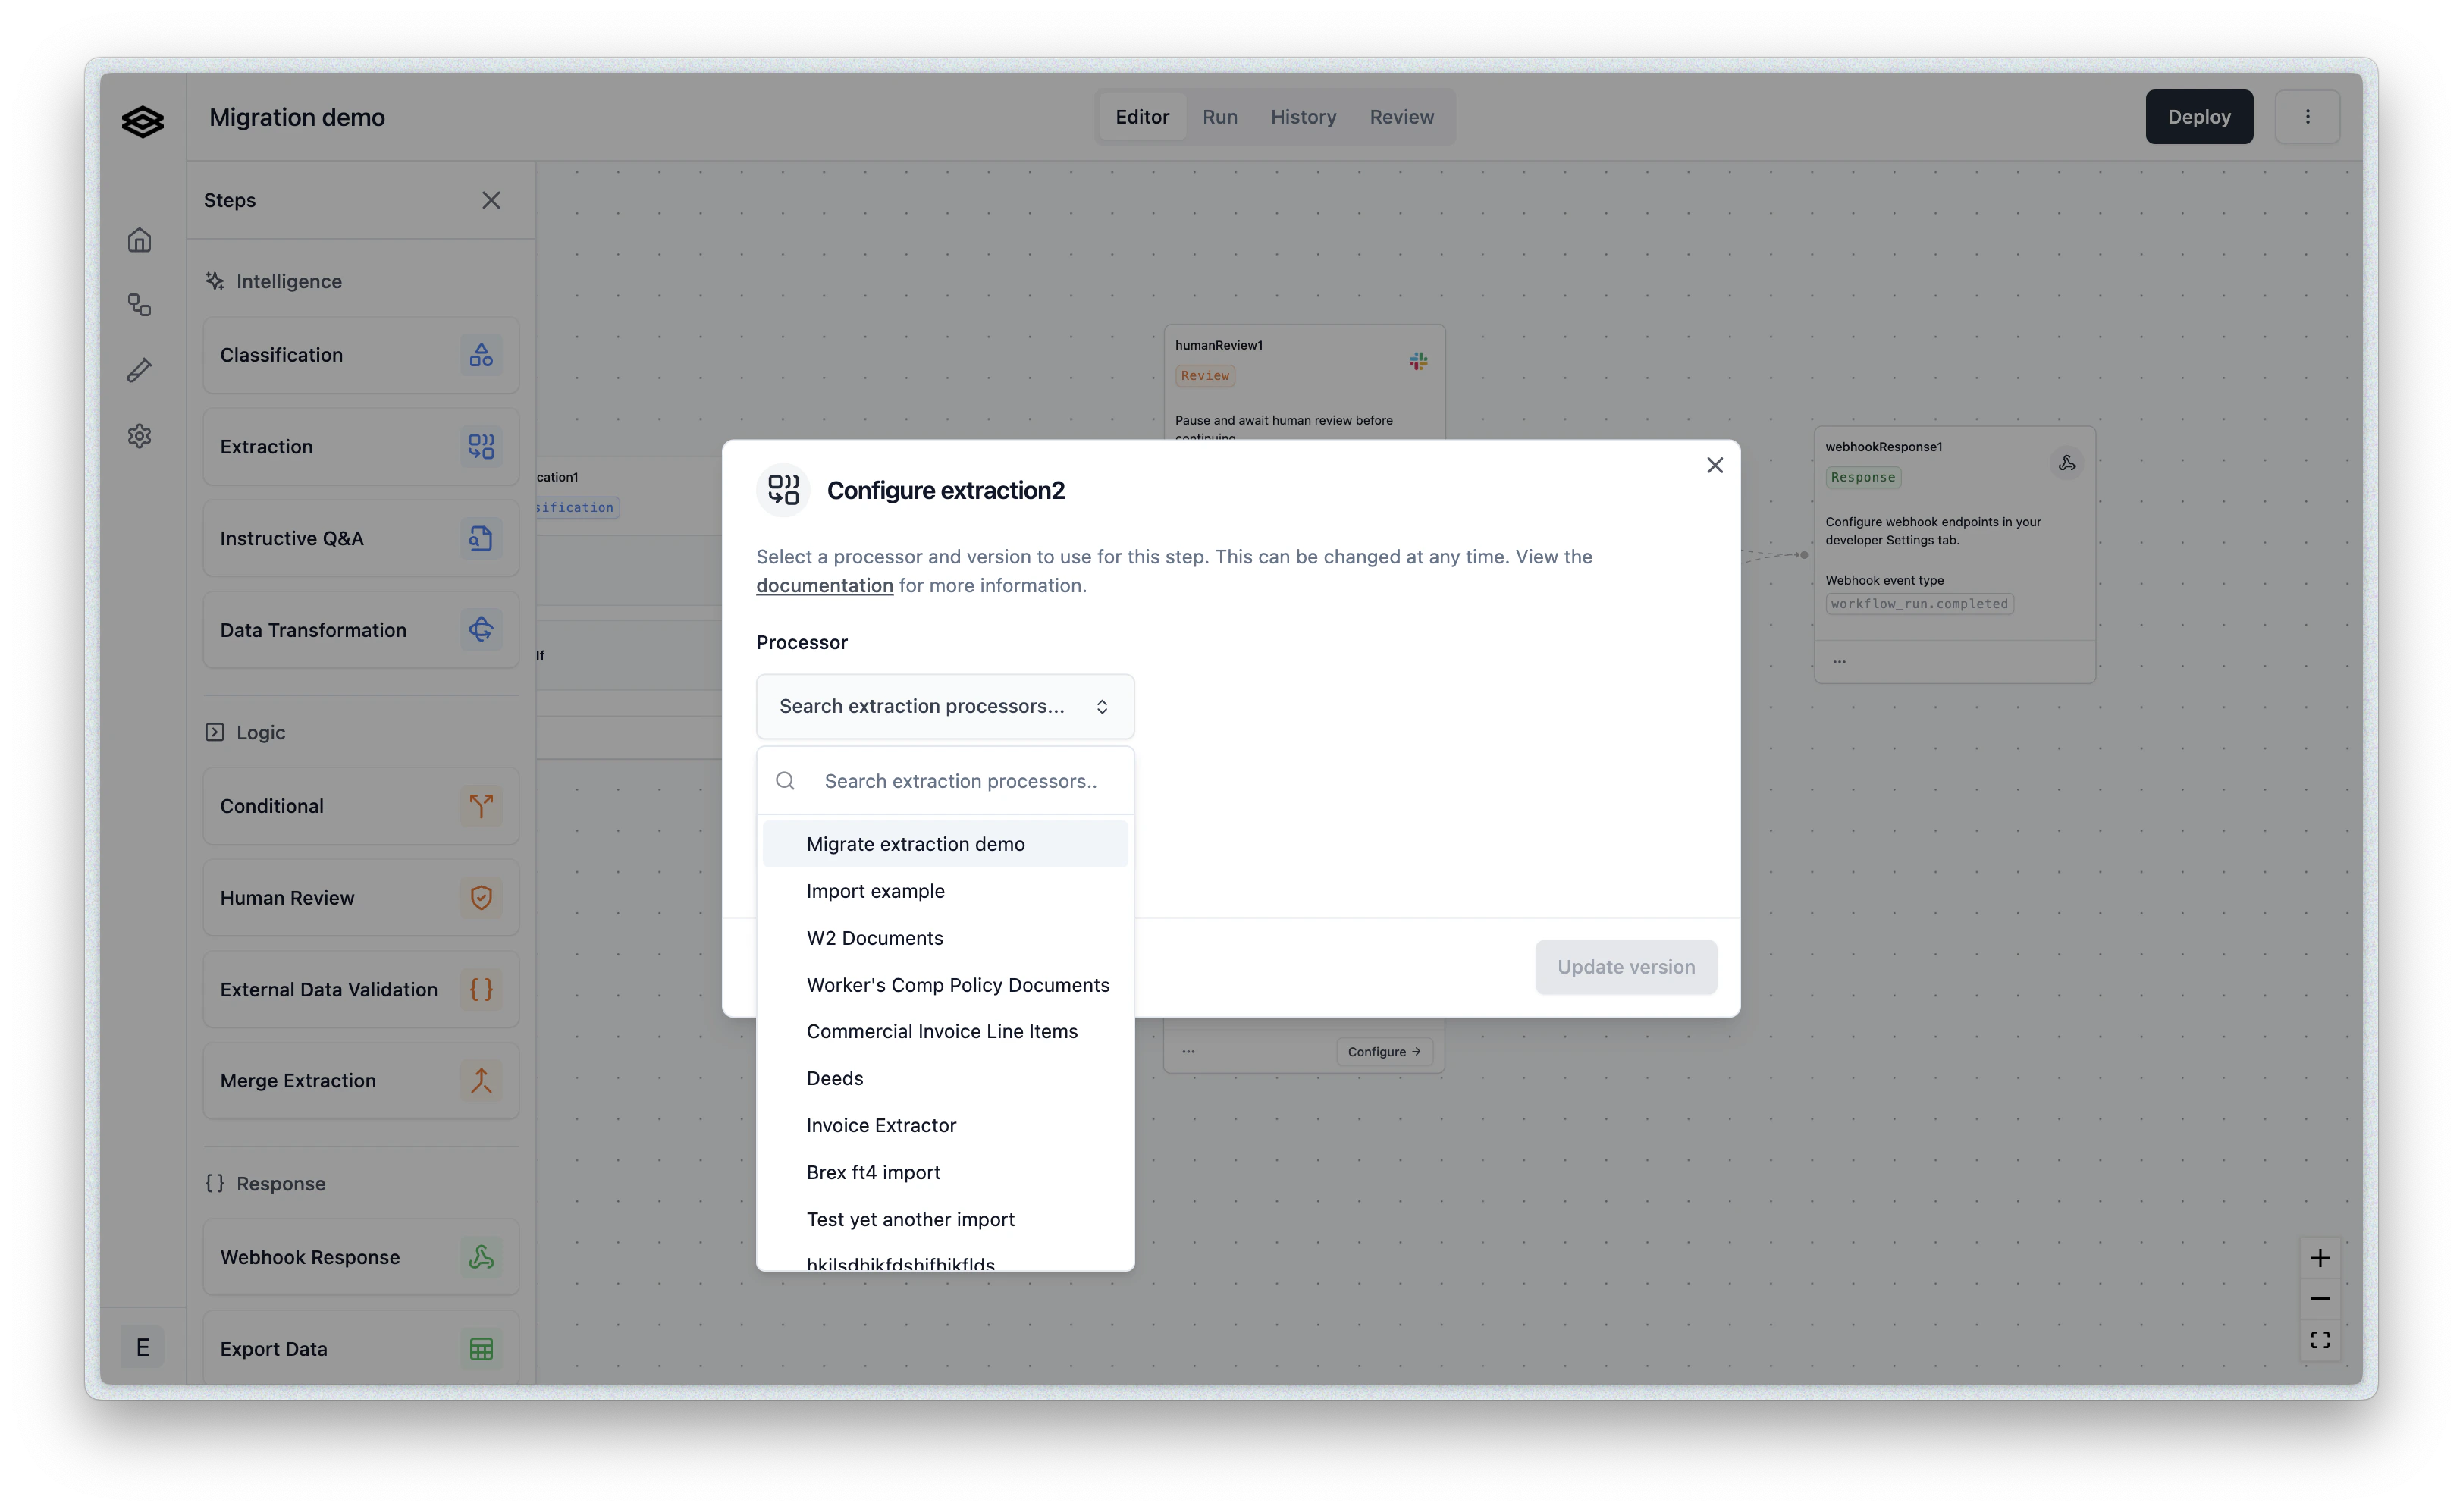
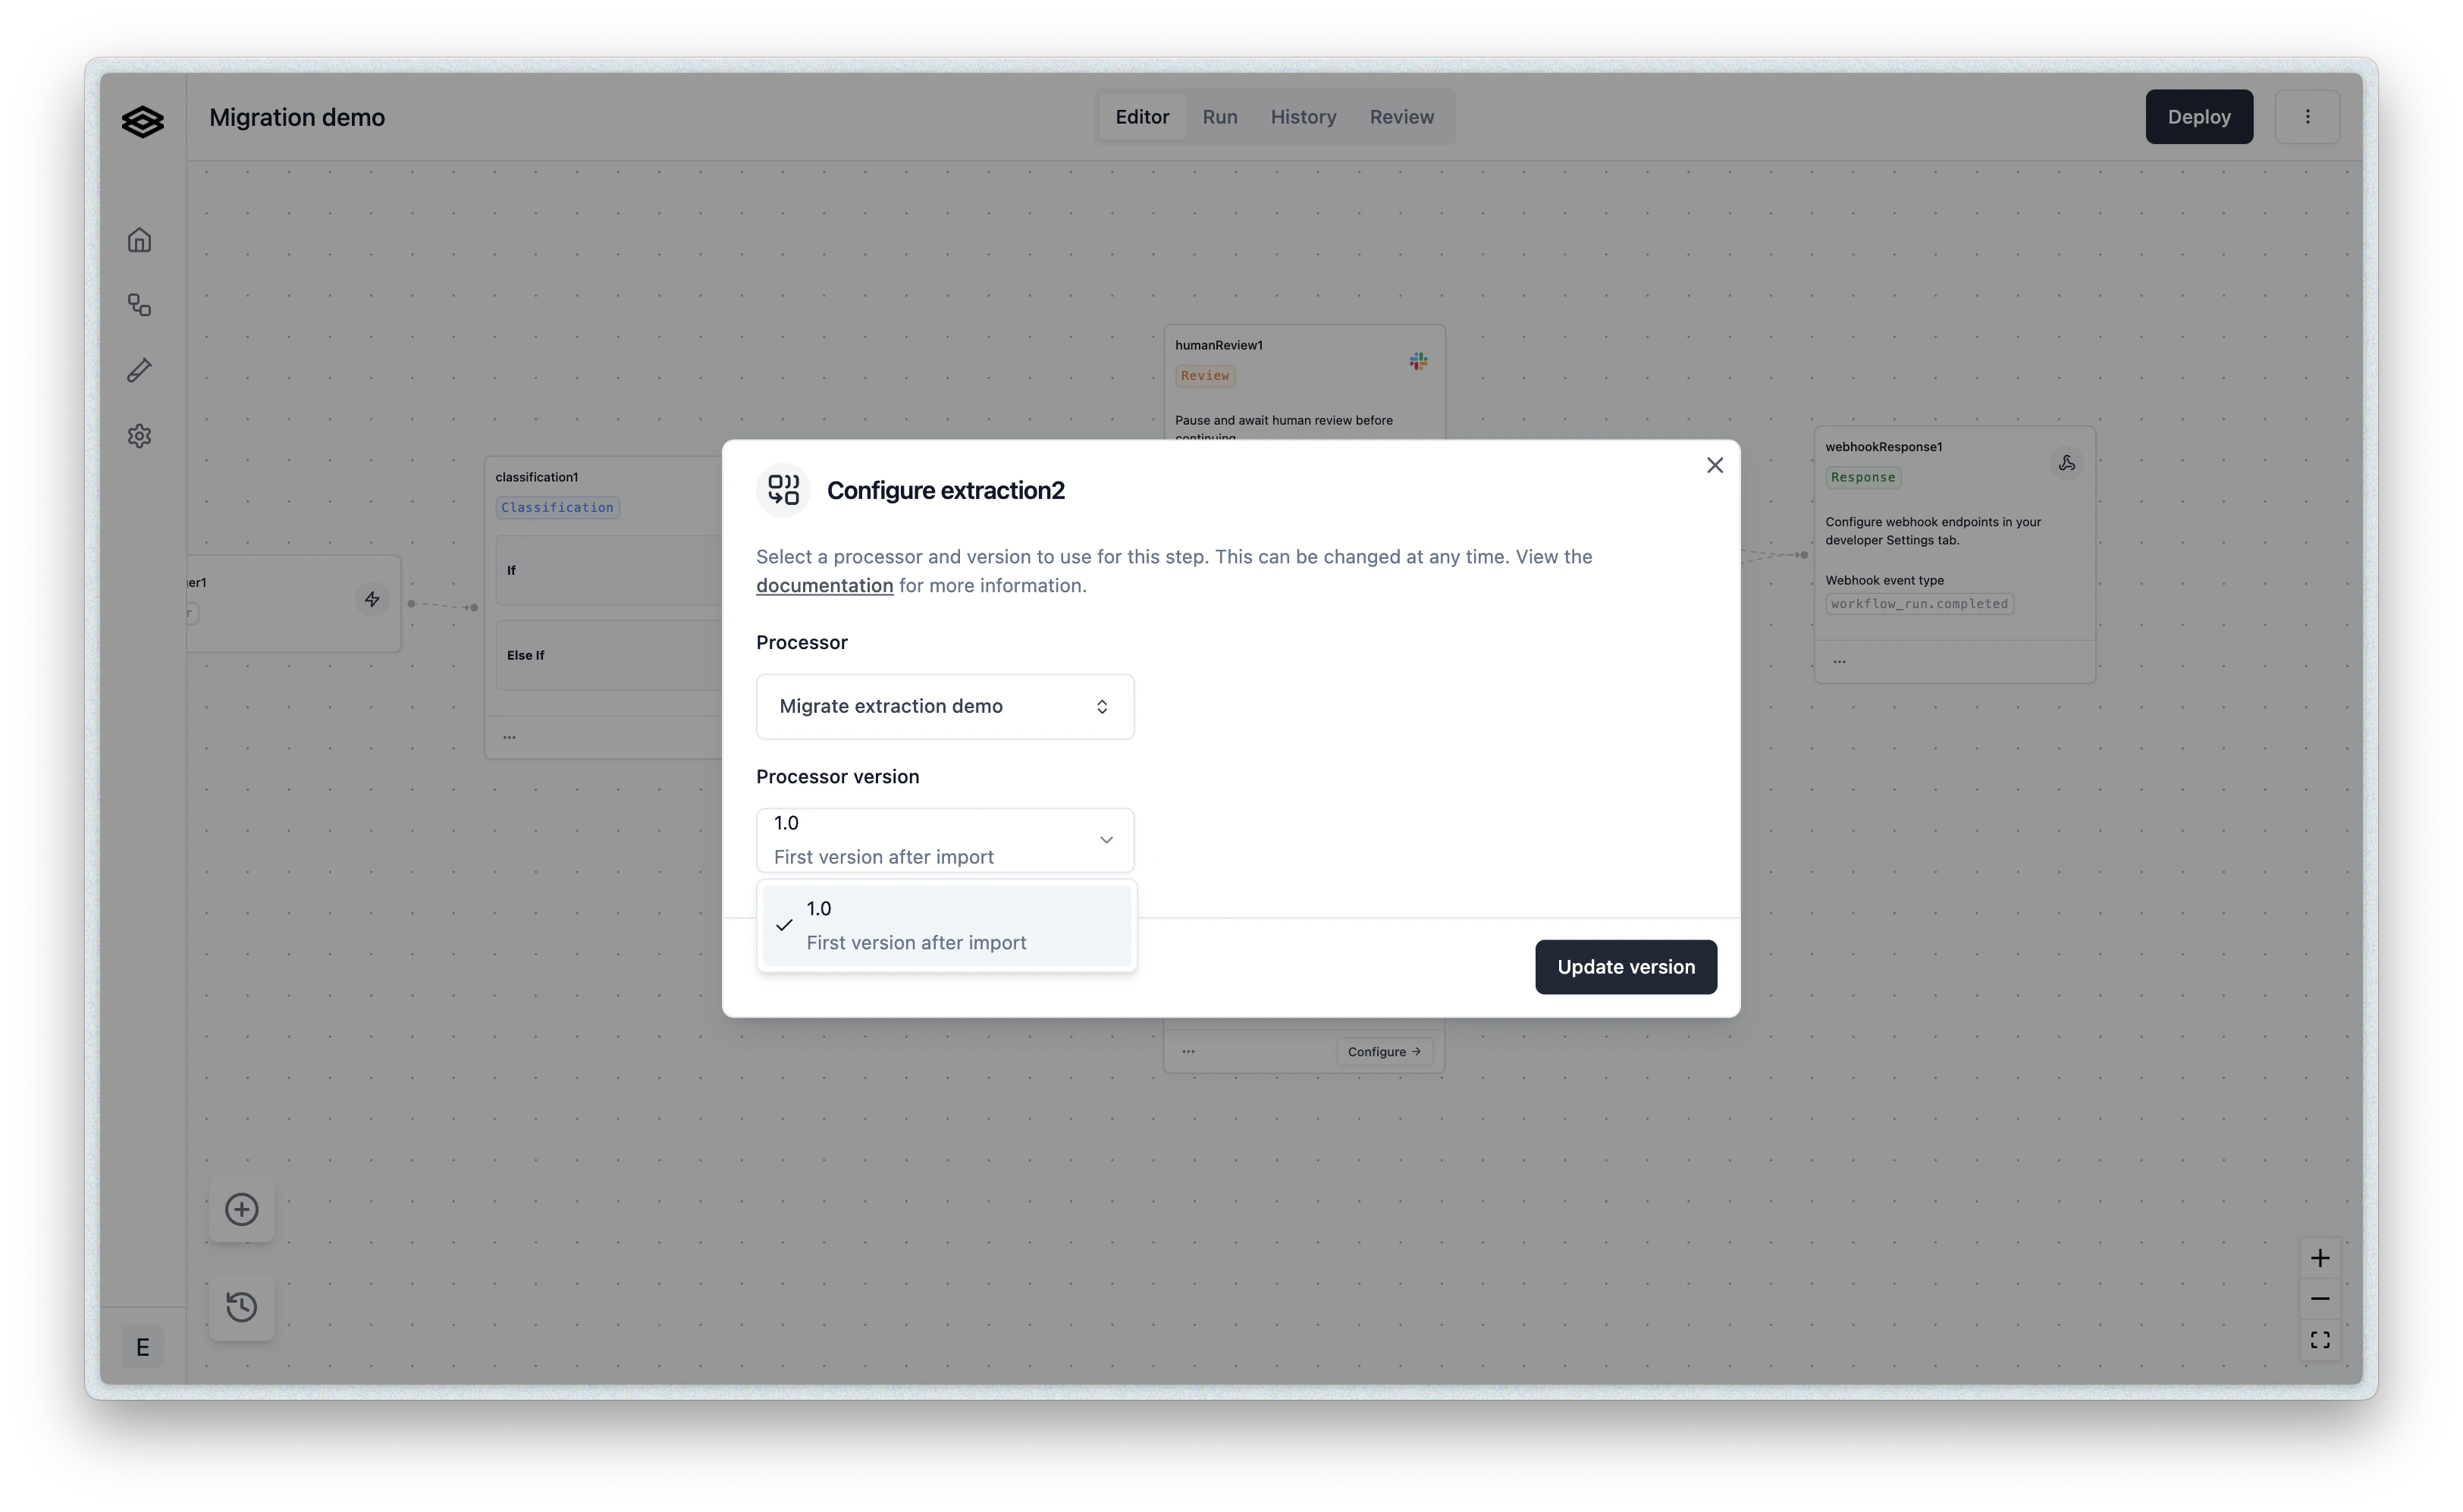
Now let’s navigate back to the workflow we started with. Open the Step menu on the left side so we can add a new extraction step: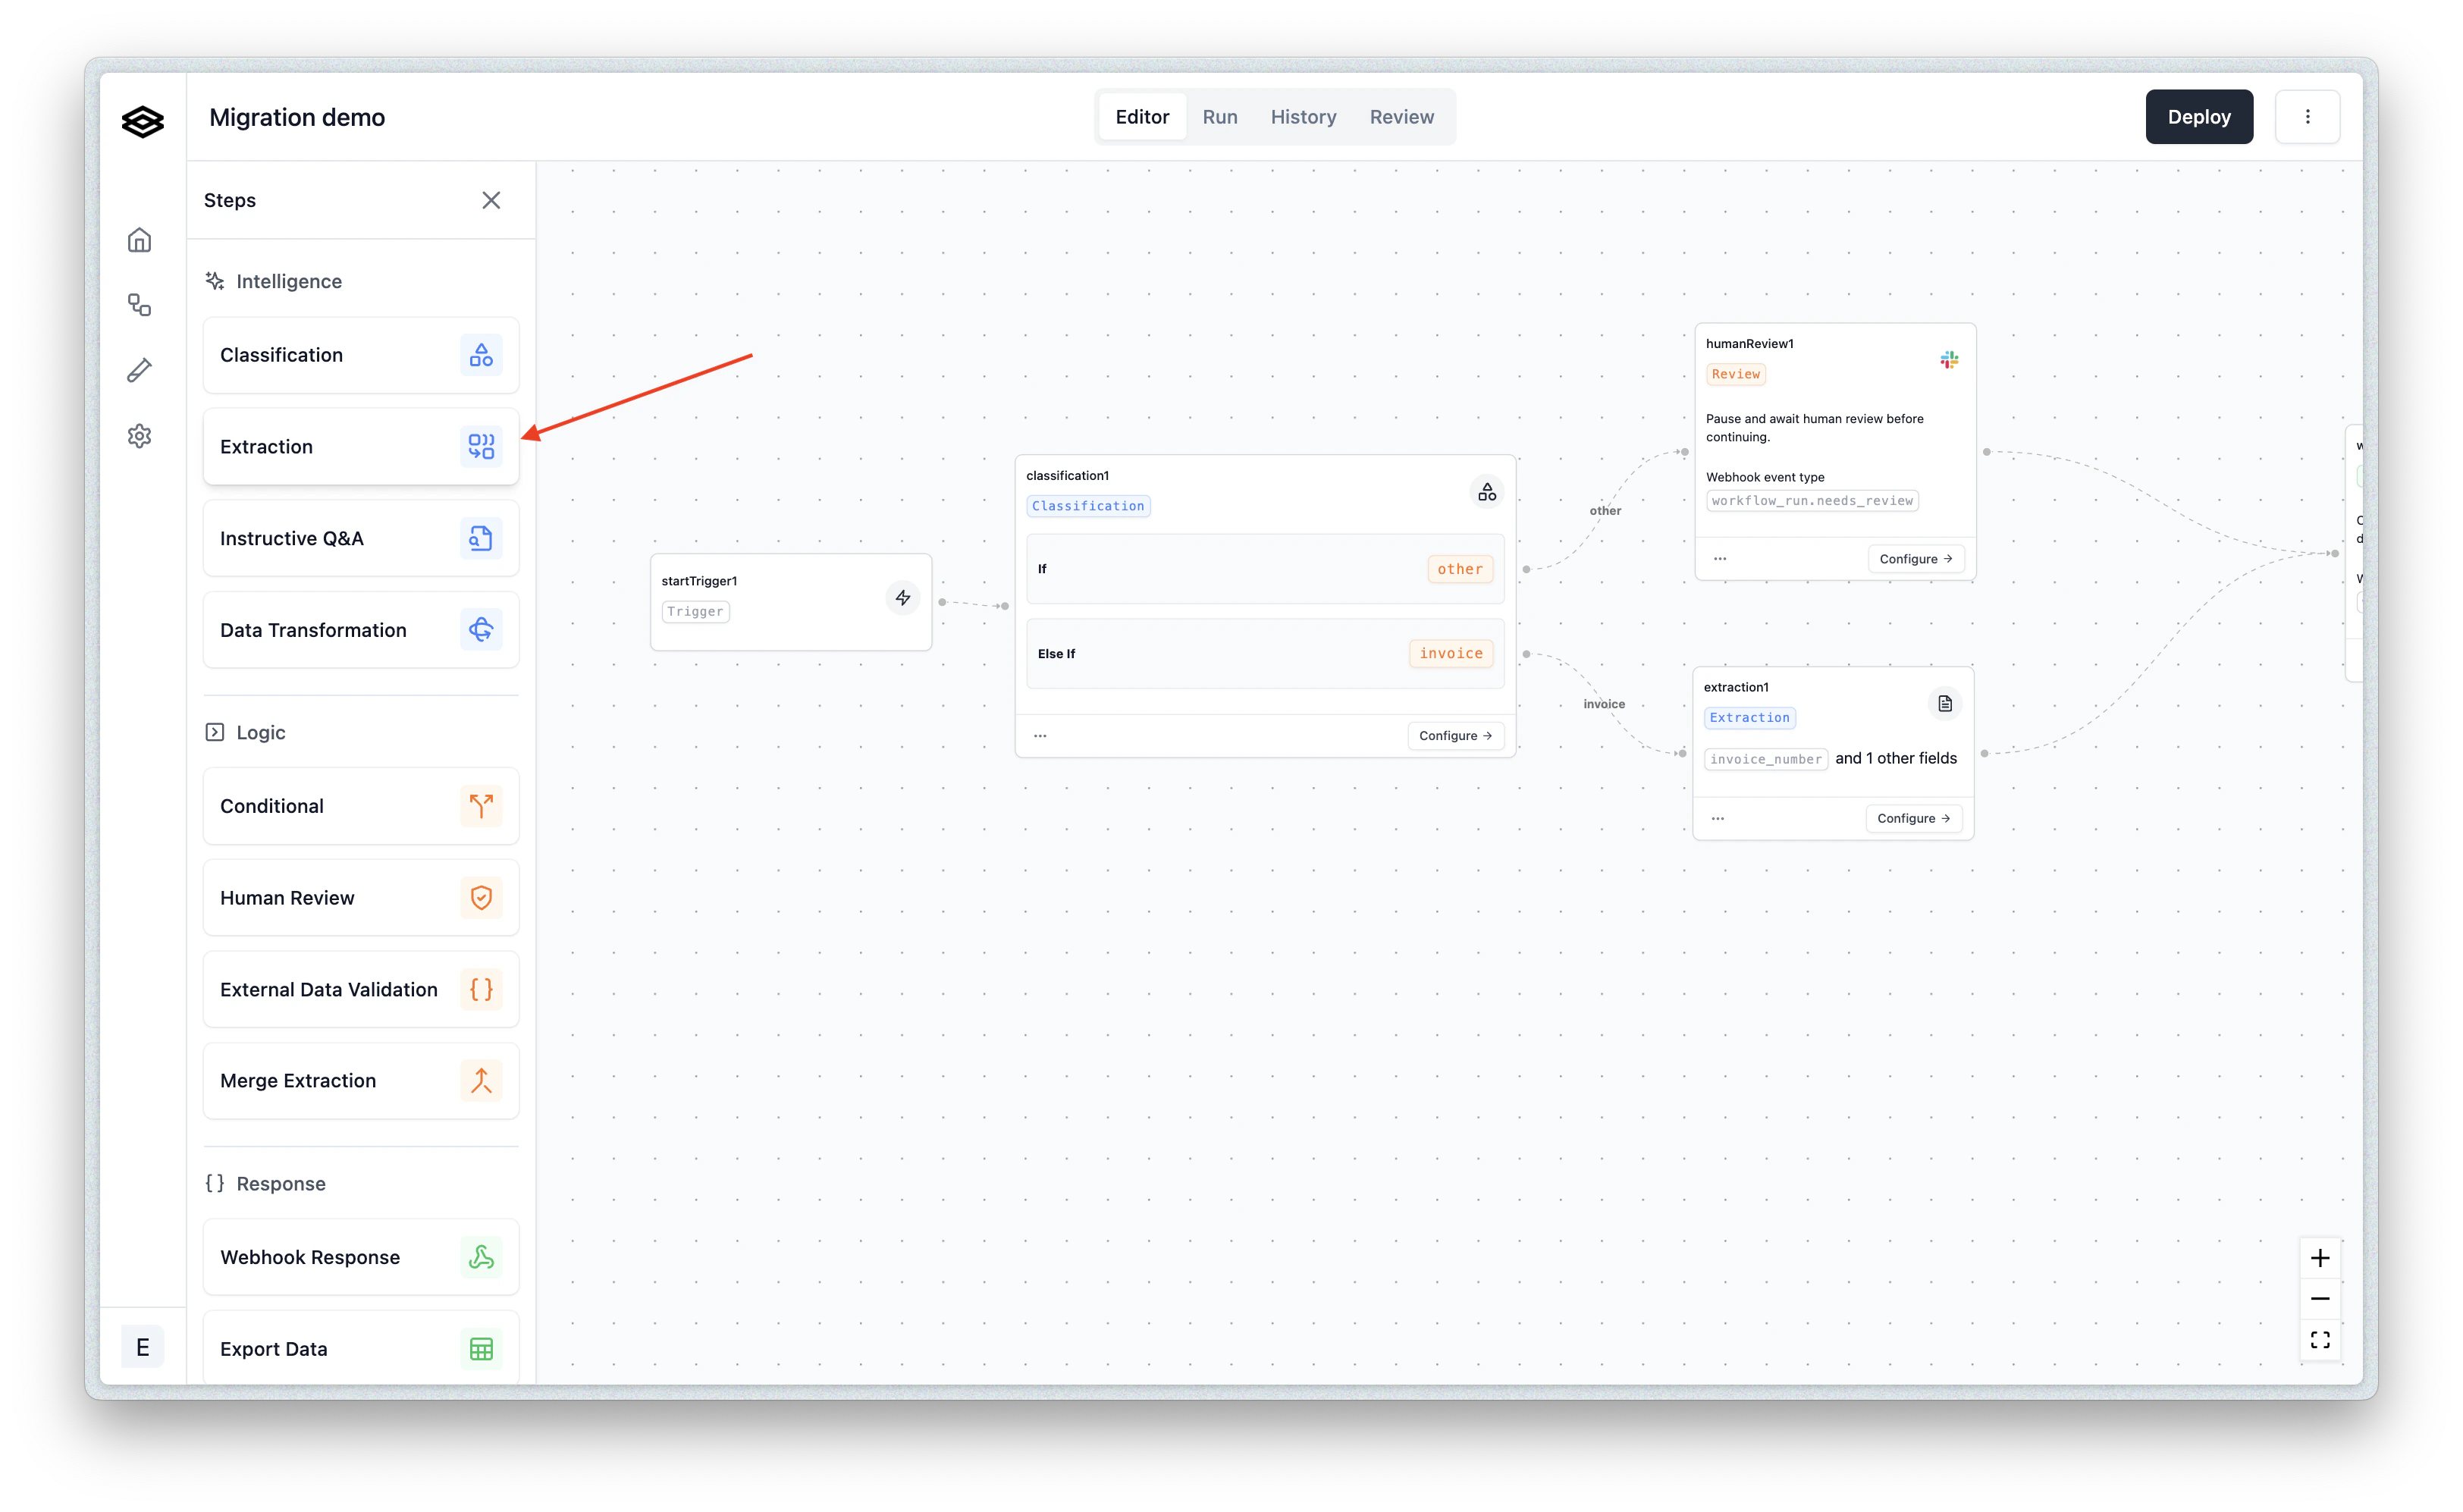
extraction2, the default name for the second extraction step:
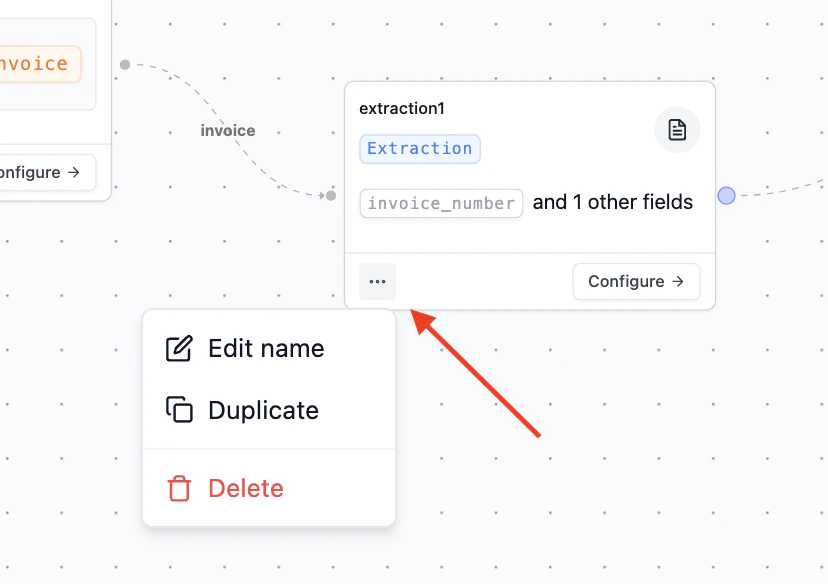
Step 5: Clean up
Now we should delete the legacy step: